Hardware Guide
Table of Contents
Manufacturing Setup
This guide details the step by step process of setting up a new Sphere 10 Software Blockchain Server. For any questions or more information please contact Sphere 10 Software.
Hardware
Parts of this guide and further information can be found in the HPE ProLiant MicroServer Gen10 Plus Maintenance and Service Guide
Safety considerations
Page 21-22 - HPE ProLiant MicroServer Gen10 Plus Maintenance and Service Guide
Before performing service procedures, review all the safety information.
Electrostatic discharge
Be aware of the precautions you must follow when setting up the system or handling components. A discharge of static
electricity from a finger or other conductor may damage system boards or other static-sensitive devices. This type of
damage may reduce the life expectancy of the system or component.
To prevent electrostatic damage:
-
Avoid hand contact by transporting and storing products in static-safe containers.
-
Keep electrostatic-sensitive parts in their containers until they arrive at static-free workstations.
-
Place parts on a grounded surface before removing them from their containers.
-
Avoid touching pins, leads, or circuitry.
-
Always be properly grounded when touching a static-sensitive component or assembly. Use one or more of the
following methods when handling or installing electrostatic-sensitive parts:-
Use a wrist strap connected by a ground cord to a grounded workstation or computer chassis. Wrist straps are
flexible straps with a minimum of 1 megohm ±10 percent resistance in the ground cords. To provide proper
ground, wear the strap snug against the skin. -
Use heel straps, toe straps, or boot straps at standing workstations. Wear the straps on both feet when standing
on conductive floors or dissipating floor mats. -
Use conductive field service tools.
-
Use a portable field service kit with a folding static-dissipating work mat.
-
Use a wrist strap connected by a ground cord to a grounded workstation or computer chassis. Wrist straps are
For more information, refer to the HPE ProLiant MicroServer Gen10 Plus Maintenance and Service Guide.
Parts List
-
HP MicroServer - Intel Xeon E-2224 CPU, 8Gb memory, no HDD (product code P19752-371)
-
2x 16Gb DDR4 ECC unbuffered/unregistered memory modules
-
2x 2.5" to 3.5" drive adapters (full size)
-
System drive - 500Gb 2.5" SATA SSD
-
Data drive - 8Tb 2.5" SATA SSD
Removing the chassis cover
Page 23-24 - HPE ProLiant MicroServer Gen10 Plus Maintenance and Service Guide
-
Power down the server. *
-
Disconnect the power cord from the AC source. *
-
Remove the power adapter cord from the power cord clip, and then disconnect the power adapter from the server. *
-
Disconnect all peripheral cables from the server. *
-
If installed, unlock and remove the security padlock and/or the Kensington security lock.
For more information, see the lock documentation. * -
If the server is in a vertical orientation, position the server in a horizontal orientation. *
-
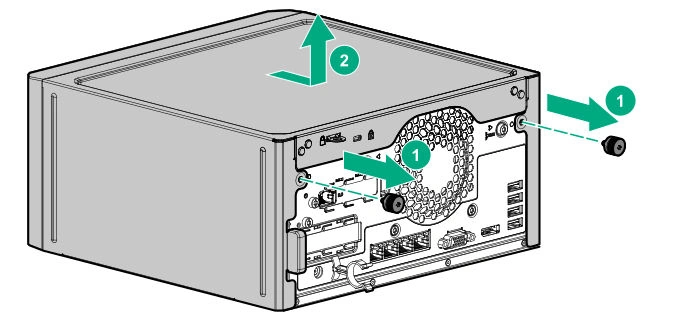
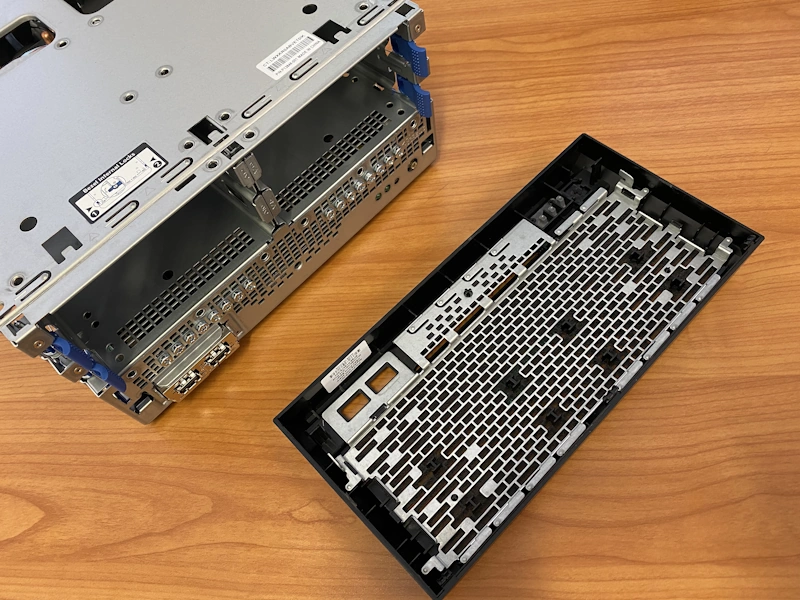
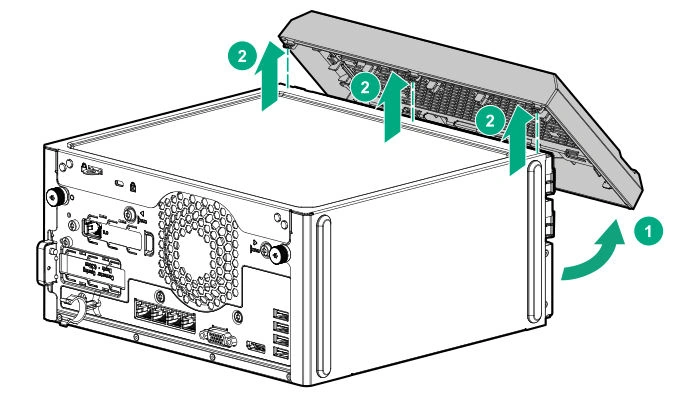
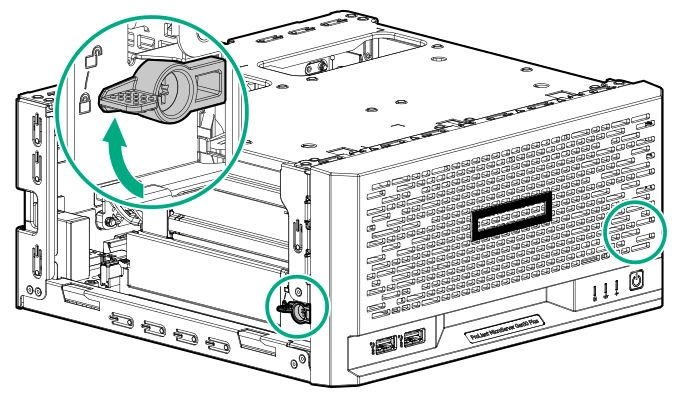
Remove the chassis cover:
-
Remove the cover thumbscrews.
If the thumbscrews are too tight, use a T-15 Torx screwdriver to remove them (diagram 1 - callout 1). -
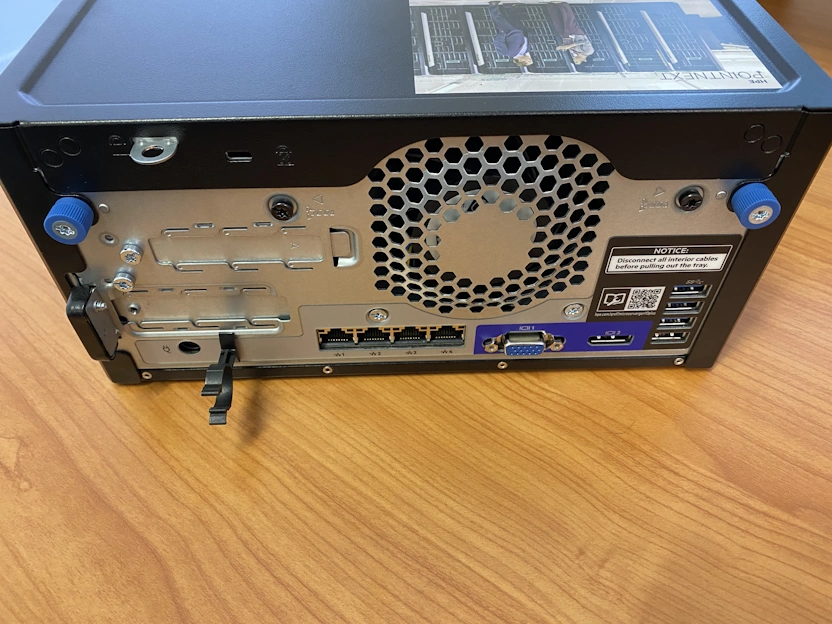
Slide the cover about half an inch towards the rear panel until the arrowhead markers on the front edge of the chassis are exposed, and then detach the cover from the server (diagram 1 - callout 2 , photo 1, photo 2).
-
Remove the cover thumbscrews.
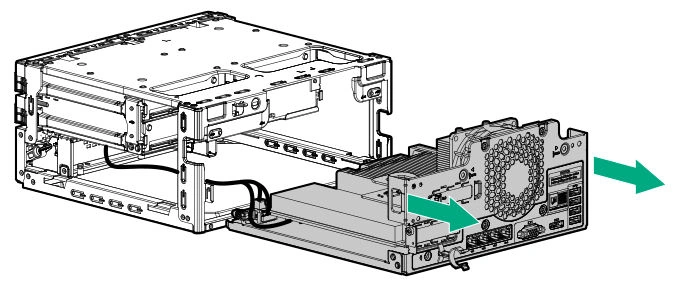
Removing the system board assembly
Page 24-26 - HPE ProLiant MicroServer Gen10 Plus Maintenance and Service Guide
Before you perform this procedure, make sure that you have a T-15 Torx screwdriver available.
-
If a tall internal USB device is installed, remove the device. *
-
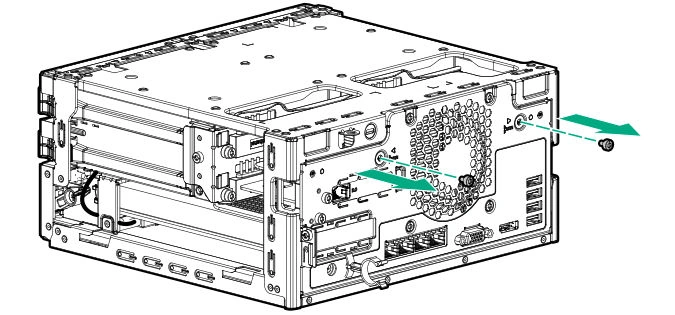
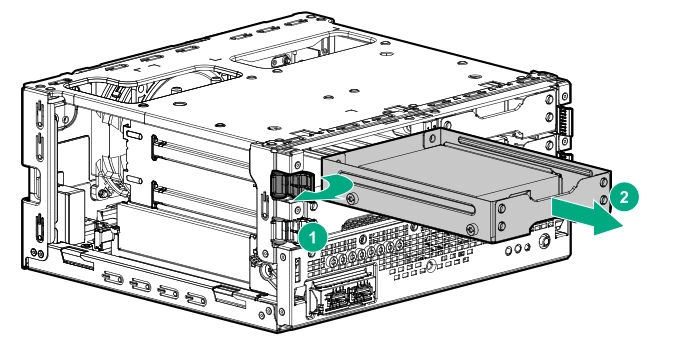
Remove the system board tray screws (diagram 2).
IMPORTANT: The storage cables connect the system board to the chassis. If you are completely separating the system board assembly from the chassis, disconnect the storage cabling. * -
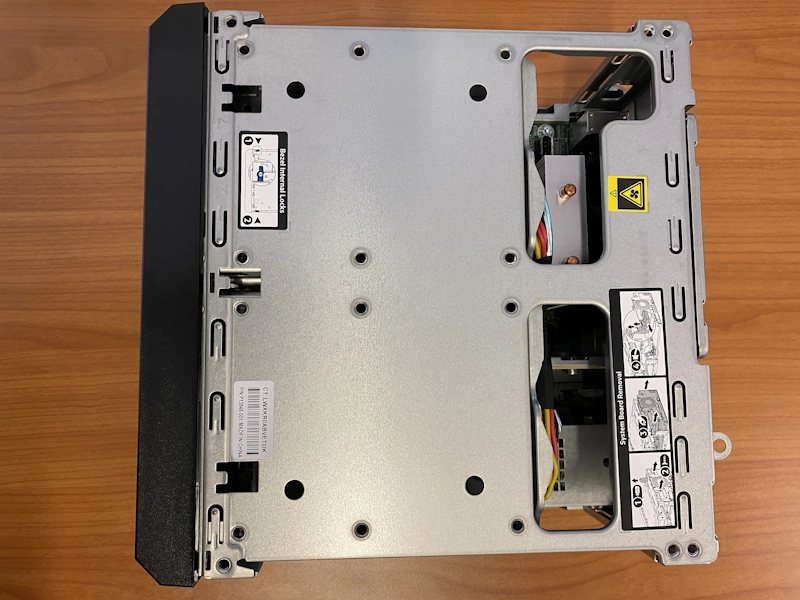
Use the blue touchpoints on both sides of the tray to pull out the system board assembly from the chassis (diagram 3, photo 3).

Installing memory
Page 35-36 - HPE ProLiant MicroServer Gen10 Plus Maintenance and Service Guide
Memory module slots are located between the heatsink and edge of the system board on the left hand side of the MicroServer.
-
Remove the supplied memory module
-
Push both clips of the memory module slot outward (diagram 4 - callout 1, photo 4).
-
Lift memory module out (diagram 4 - callout 2, photo 5).
-
Push both clips of the memory module slot outward (diagram 4 - callout 1, photo 4).
-
Install memory modules
-
Check both clips of the empty memory module slot are pushed outward.
-
Slot the memory module in from above.
IMPORTANT: Memory modules will only fit in one direction. Use the notch in the memory module slot and on the memory module to check for the correct orientation.-
Push down firmly on the memory module to engage both clips.
-
Repeat the process for the second memory module (photo 6).
-
Check both clips of the empty memory module slot are pushed outward.

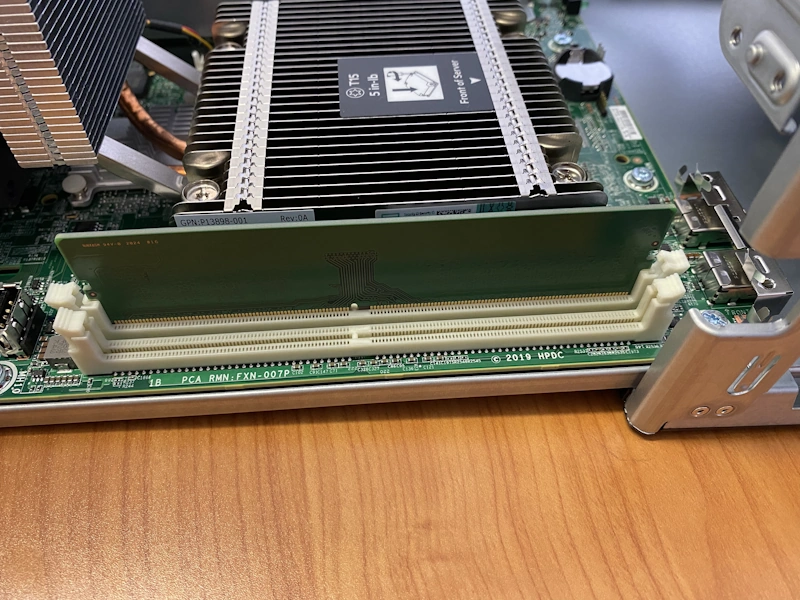
Photo 4 - Both clips of the memory module slot pushed outward.
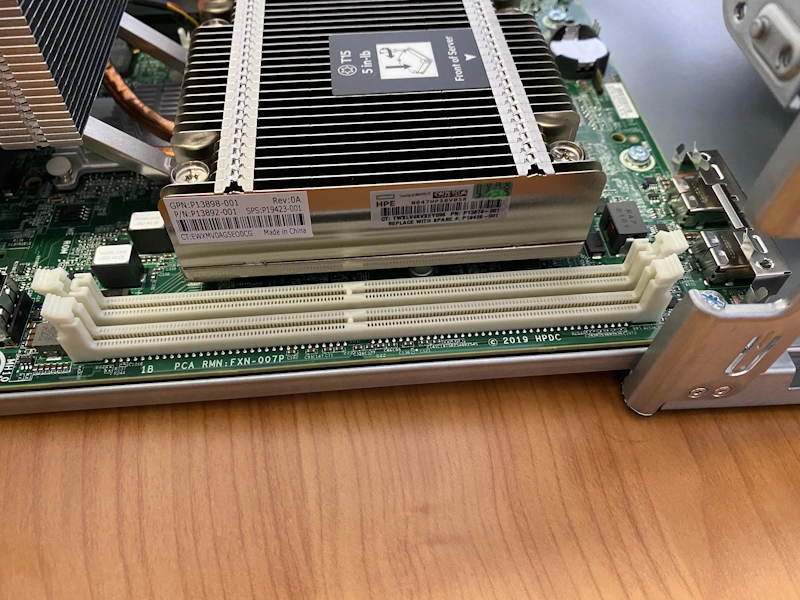
Photo 5 - Memory module removed.
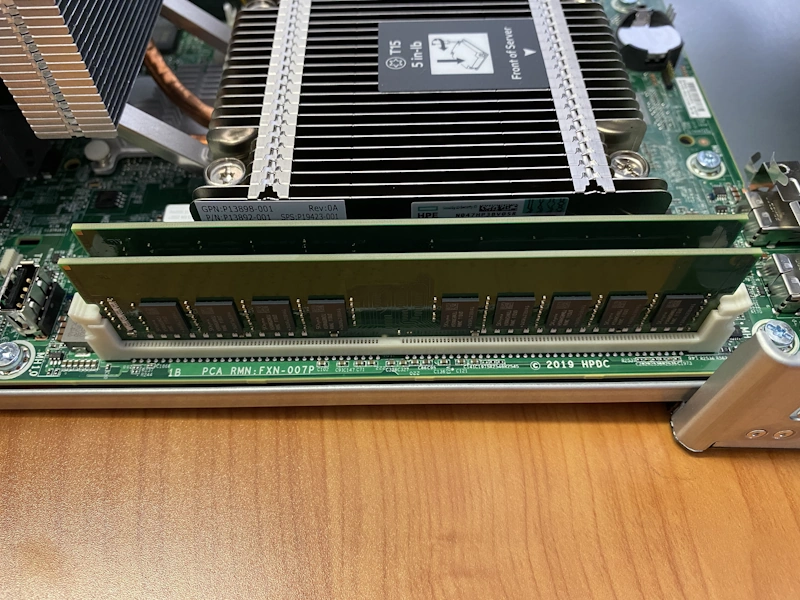
Photo 6 - Both memory modules installed.
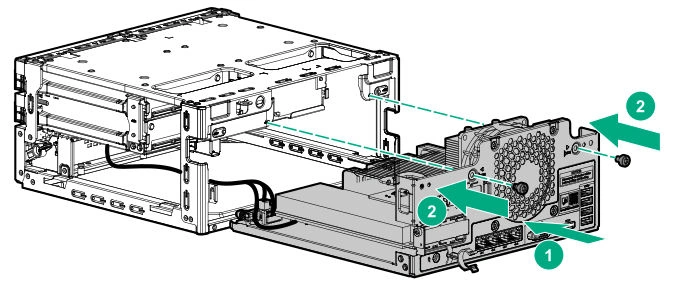
Installing the system board assembly
Page 26-27 - HPE ProLiant MicroServer Gen10 Plus Maintenance and Service Guide
Before you perform this procedure, make sure that you have a T-15 Torx screwdriver available.
-
If the storage cables were removed, reconnect the cables. *
-
Install the system board assembly:
-
Slide the system board assembly into the chassis (diagram 5 - callout 1).
-
Install the system board assembly screws (diagram 5 - callout 2).
-
Slide the system board assembly into the chassis (diagram 5 - callout 1).
Removing the front bezel
Page 28-30 - HPE ProLiant MicroServer Gen10 Plus Maintenance and Service Guide
-
If the front bezel is locked, do the following:
-
Switch the bezel locks upward (diagram 6).
-
Switch the bezel locks upward (diagram 6).
-
To remove an unlocked front bezel, do the following:
-
Pivot the bottom part of the bezel upward (diagram 7 - callout 1).
-
Release the bezel tabs from their chassis openings (diagram 7 - callout 2).
-
Pivot the bottom part of the bezel upward (diagram 7 - callout 1).


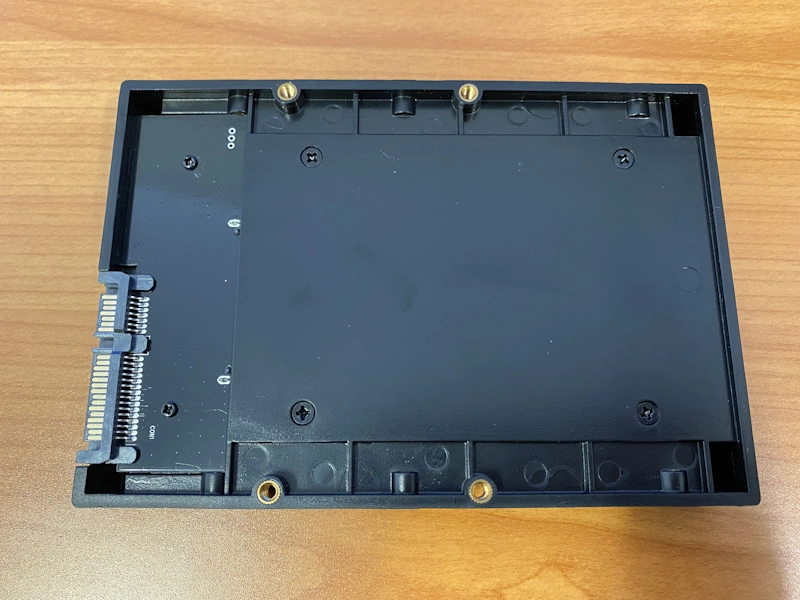
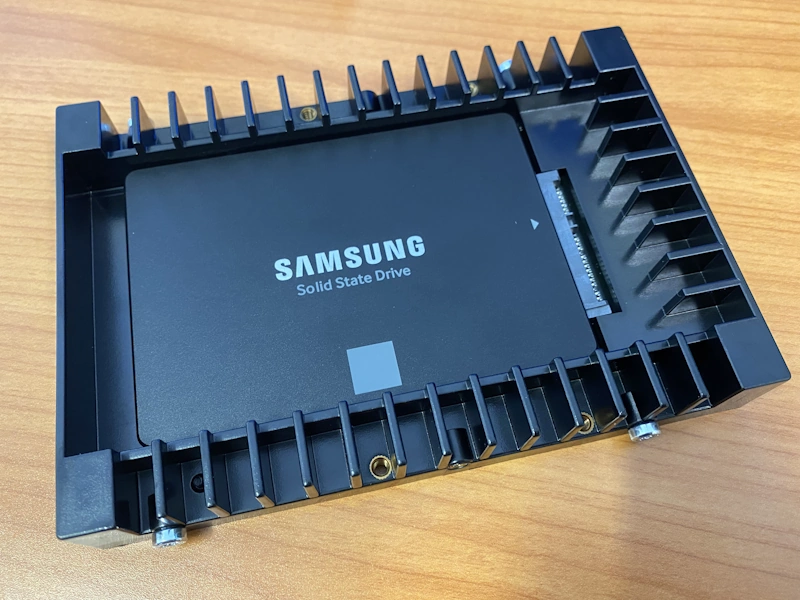
Installing storage drives
Before you perform this procedure, make sure that you have a Phillips head screwdriver and a T-15 Torx screwdriver available.
-
Insert each SSD into the 2.5" to 3.5" drive adapter.
-
Secure the SSD to the drive adapter bracket on the under side using the supplied screws (photo 8).
-
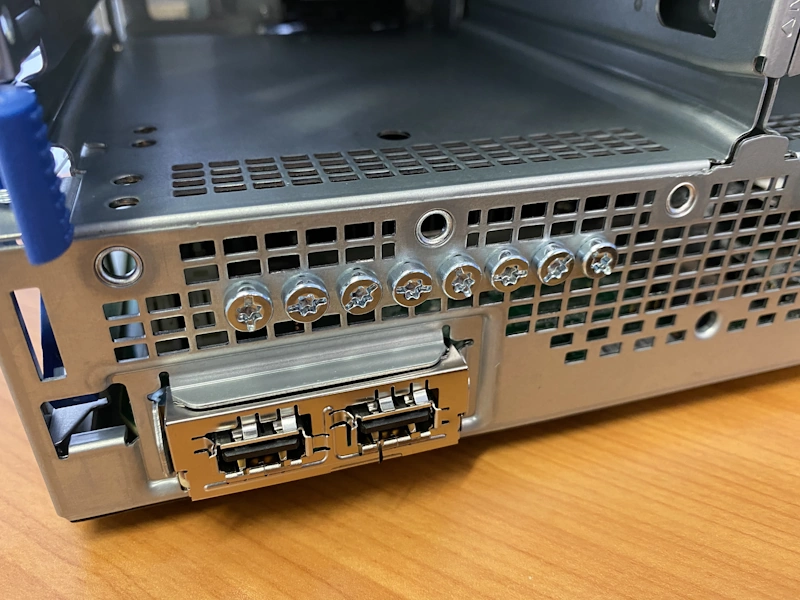
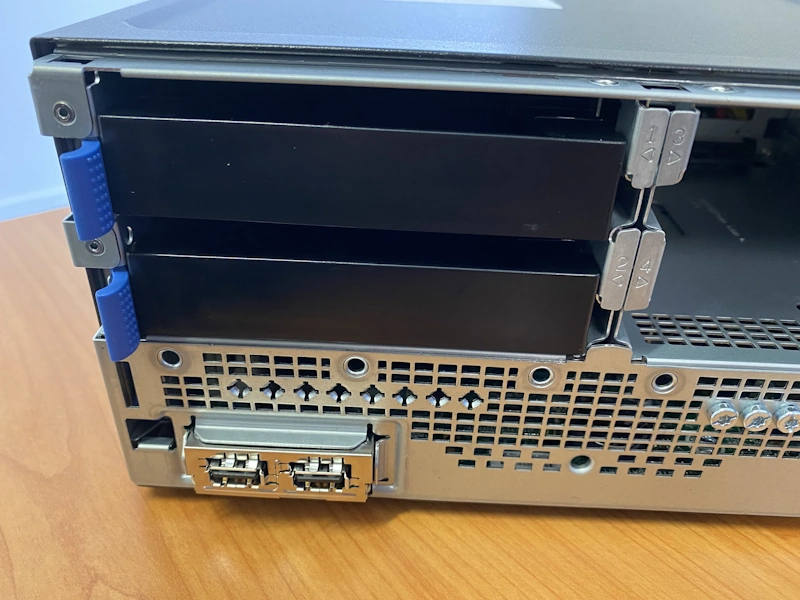
With the front bezel removed, remove 4x T-15 Torx screws from the front of the MicroServer (photo 9).
-
Insert a T-15 Torx screw in the front and rear screw holes on each side of the drive adapter (photo 10).
-
Install the smaller capacity SSD into drive bay 1 located in the top left position and insert the larger capacity SSD into drive bay 2 located in the bottom left position (photo 11).
Page 32-33 - HPE ProLiant MicroServer Gen10 Plus Maintenance and Service Guide-
Insert SSD and drive adapter with screws into appropriate drive bay (diagram 8 - callout 2).
-
Push in firmly until the blue drive latch clicks (diagram 8 - callout 1).
-
Insert SSD and drive adapter with screws into appropriate drive bay (diagram 8 - callout 2).
Replacing the front bezel
Page 28-30 - HPE ProLiant MicroServer Gen10 Plus Maintenance and Service Guide
Reverse of removing the front bezel
-
To replace a bezel, do the following:
-
Insert the bezel tabs into their chassis openings (diagram 9 - callout 2).
-
Pivot the bottom part of the bezel downward (diagram 9 - callout 1).
-
Insert the bezel tabs into their chassis openings (diagram 9 - callout 2).
-
Lock the front bezel, do the following:
-
Switch the bezel locks downward (diagram 10).
-
Switch the bezel locks downward (diagram 10).
Installing the chassis cover
Page 27-28 - HPE ProLiant MicroServer Gen10 Plus Maintenance and Service Guide
-
Install the chassis cover:
-
Insert the cover tabs to their chassis openings. Make sure that the cover is flushed against the top of the chassis (diagram 10).
-
Slide the chassis cover towards the front panel (diagram 11 - callout 1), and then install the chassis thumbscrews (diagram 11 - callout 2).
-
Insert the cover tabs to their chassis openings. Make sure that the cover is flushed against the top of the chassis (diagram 10).
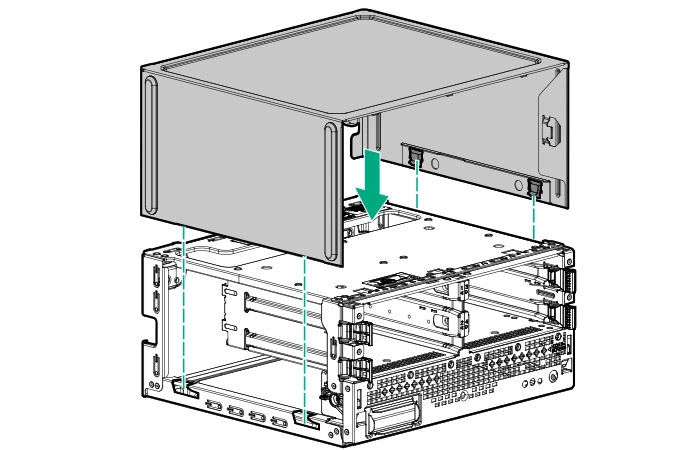
Diagram 10.
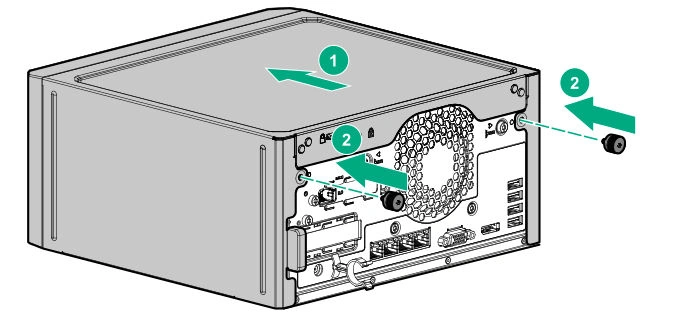
Diagram 11 with callout 1 and callout 2.
Preparing For first power up
-
Connect all peripheral cables to the server:
-
A monitor with VGA or Display Port input.
-
A USB keyboard.
-
A USB mouse.
-
A monitor with VGA or Display Port input.
-
Connect an ethernet network cable from the Local Area Network (LAN) to ethernet network port 1.
-
Connect the power adapter to the server, and then secure the power adapter cord in the power cord clip.
-
Connect the power cord to the AC power source.
Preparing Network
Setup either a static reservation or static configuration for the IP address of both the host server and virtual server after installing the operating systems.
If you are unsure how to do this, contact your network administrator.
Windows Server Host Setup
Follow these instructions to setup the Microsoft Windows Server based Blockchain SQL host server.
Preparation
A Microsoft Windows Server 2019 Essentials setup USB drive is required to perform the software setup. The following is required to make one:
-
A working Microsoft Windows-based computer (Windows 10 preferred).
-
8Gb or larger USB 3.0 or later drive.
-
Rufus.
Download from https://rufus.ie/en/. -
Windows Server 2019 Essentials ISO file.
Download evaluation from https://www.microsoft.com/en-us/evalcenter/evaluate-windows-server-2019-essentials (select "Windows Server 2019 Essentials").
The evaluation version can be used to install or activate to a licensed version with a valid product key.
After making one setup USB drive it can be used multiple times. It does not need to be recreated for each setup.
Creating Microsoft Windows Server 2019 Essentials Setup USB Drive
On a working Microsoft Windows-based computer (Windows 10 preferred):
-
Insert a USB drive.
-
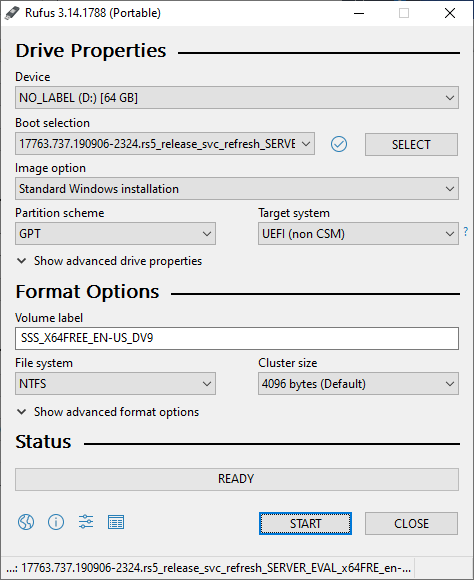
Run Rufus (picture 1).
-
Select the correct USB stick from the "Device" list.
-
Click "SELECT" and locate the Windows Server 2019 Essentials ISO file.
-
Click "START".
-
Check for the correct USB stick and click "OK" to proceed.
-
Allow process to finish.
-
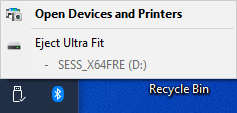
Eject/safely remove USB drive using the icon in the System Tray (picture 2).
-
Select the correct USB stick from the "Device" list.
-
Unplug USB drive.
Installing The Operating System
Install the Microsoft Windows Server 2019 Standard Operating System:
-
Insert a Microsoft Windows Server 2019 setup USB drive to any available USB port on the MicroServer.
-
Power up the MicroServer using the power button on the front panel.
-
Allow Power On Self-Test (POST) process and boot from USB drive to complete.
-
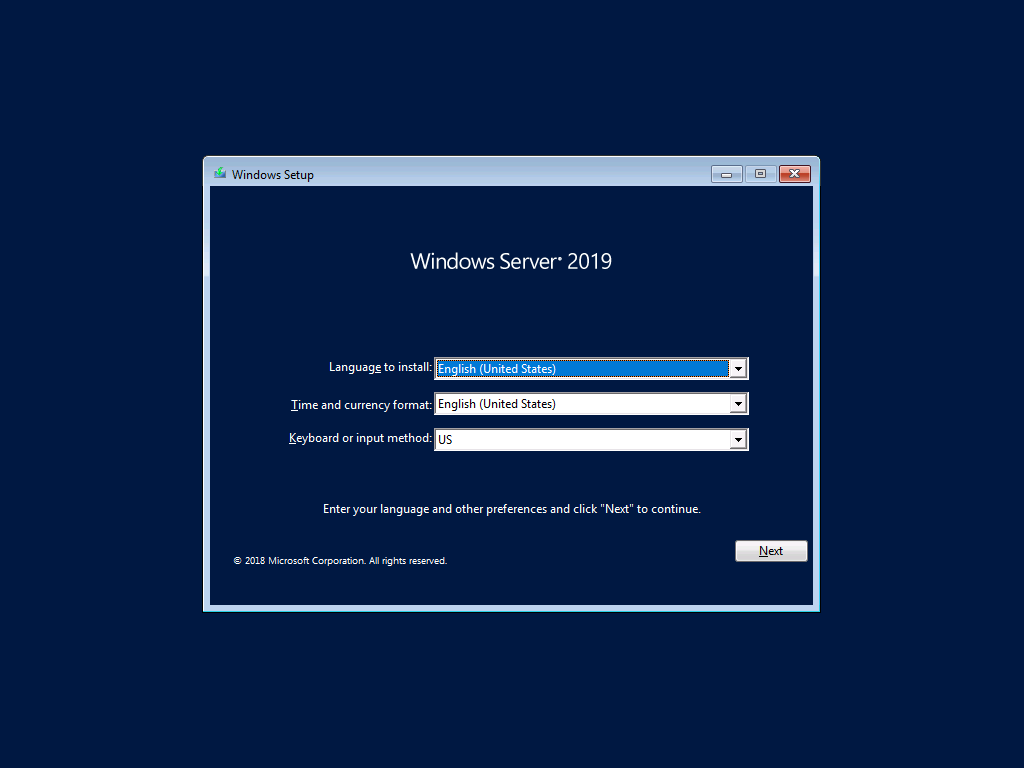
Select appropriate language and regional settings (picture 3).
-
Click "Install now".
-
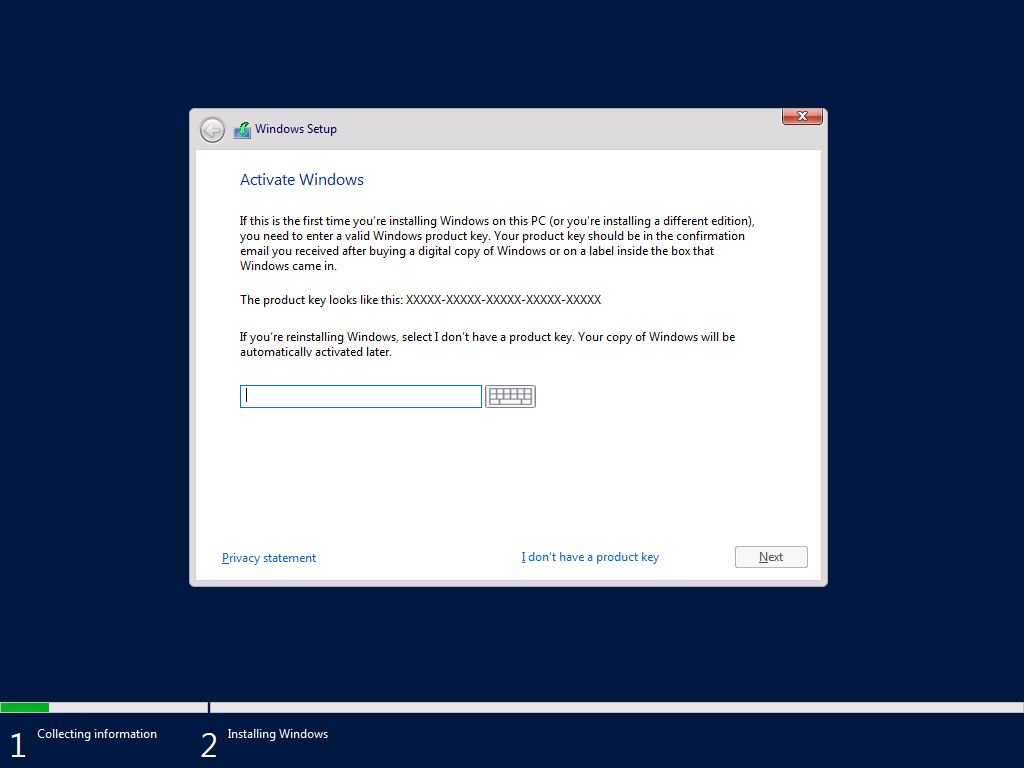
Enter the product key then click "Next" (picture 4).
-
Click the checkbox next to "I accept the license terms" then click "Next" (picture 5).
-
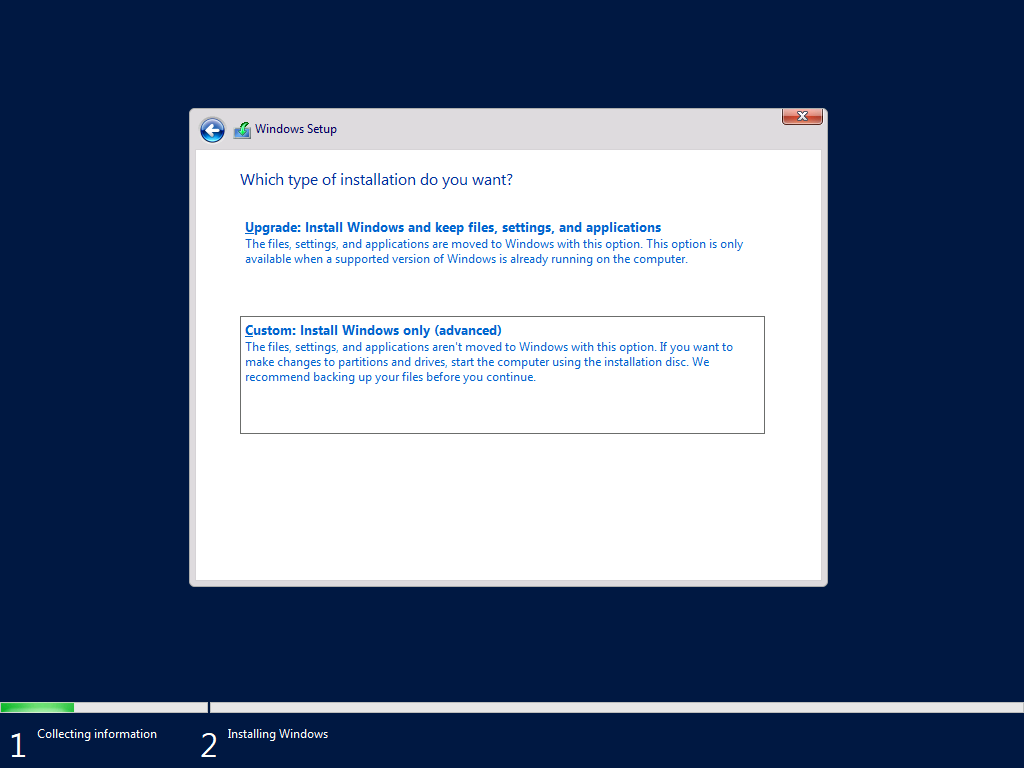
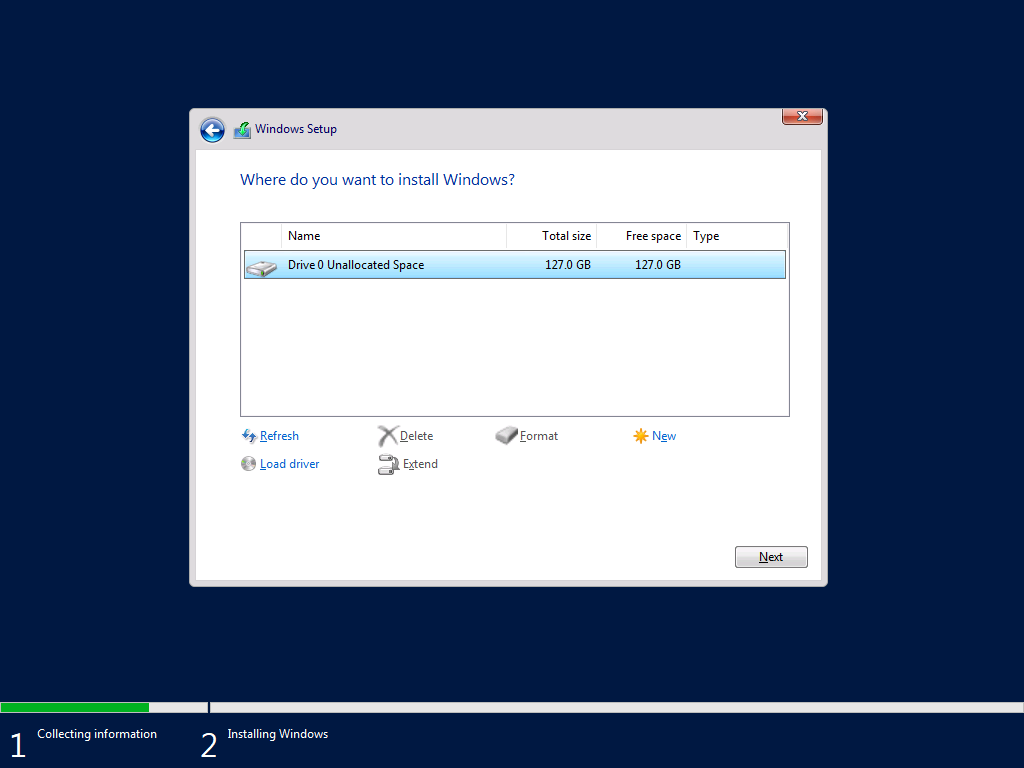
Select "Custom: Install Windows only (advanced)" for the installation type (picture 6).
-
Select the primary drive (the smallest drive, drive 0) then click "Next" (picture 7).
-
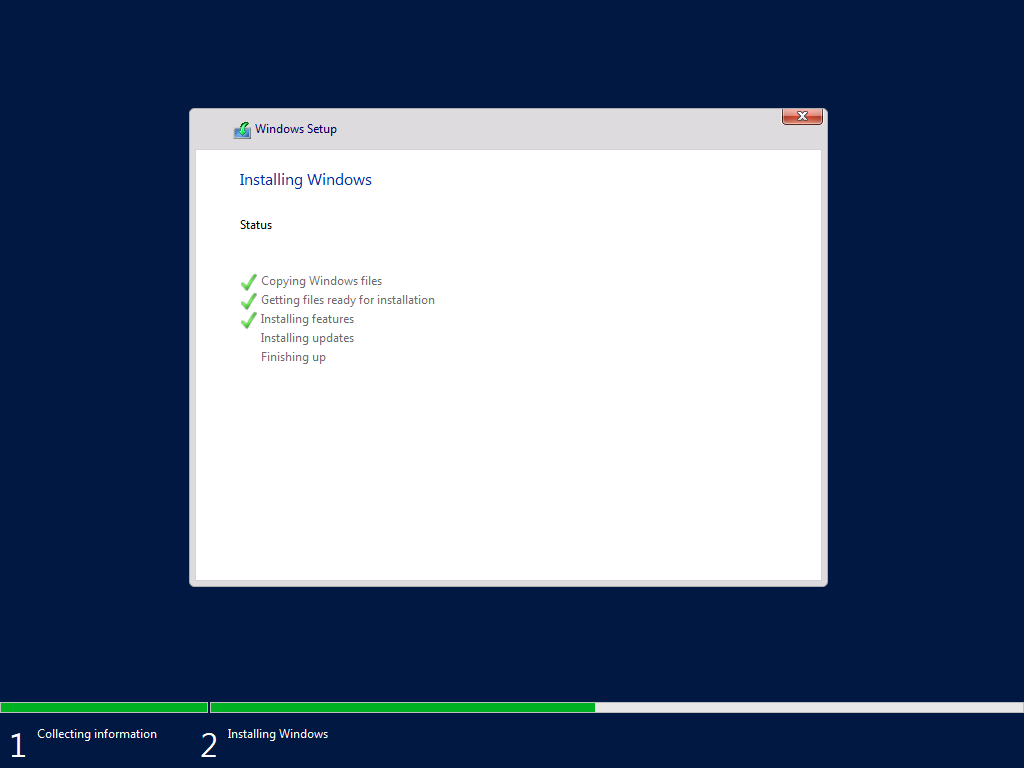
Allow Windows Setup to proceed and restart automatically (picture 8).
-
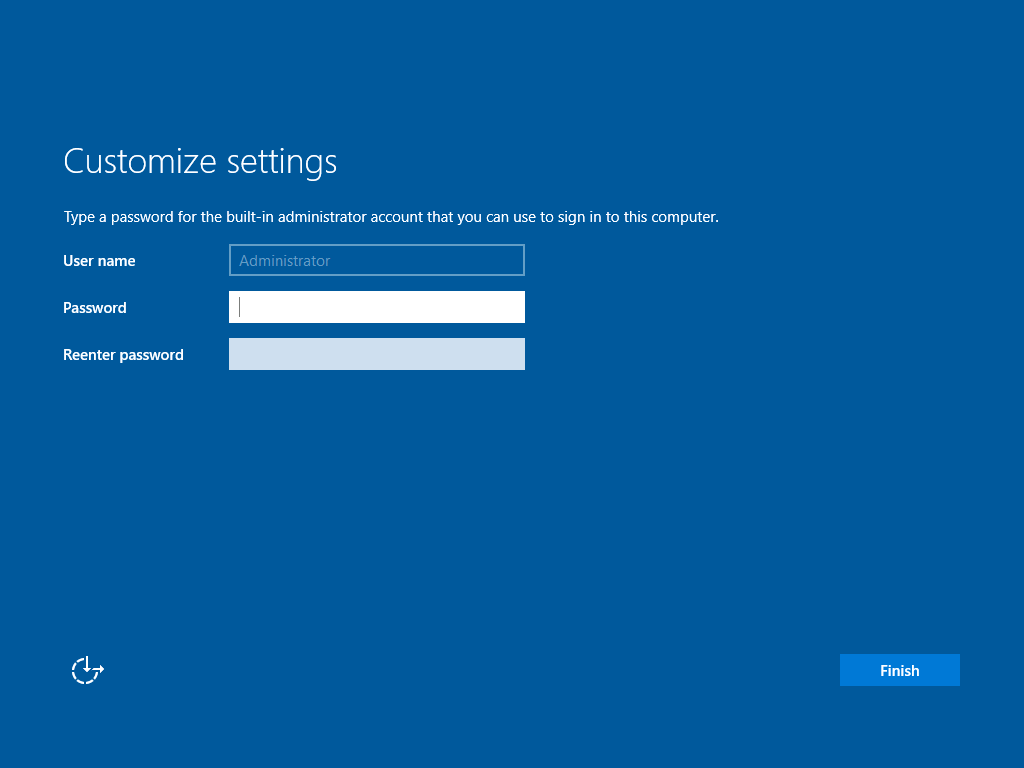
After restart is complete, enter password for Administrator account twice (picture 9).
-
Record the password somewhere securely.
Make sure the
Administratorpassword is stored somewhere securely. -
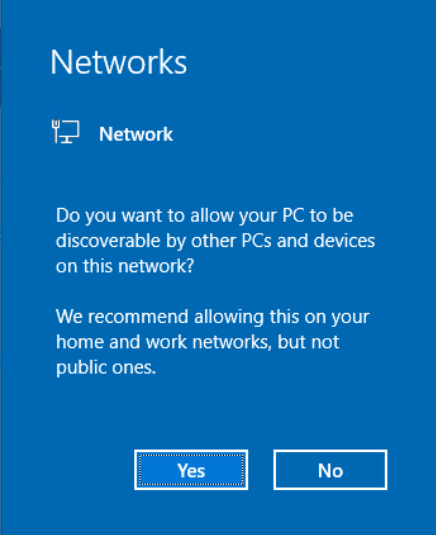
Click "Yes" to allow the server to be discovered by other PC and devices on the network (picture 10).
-
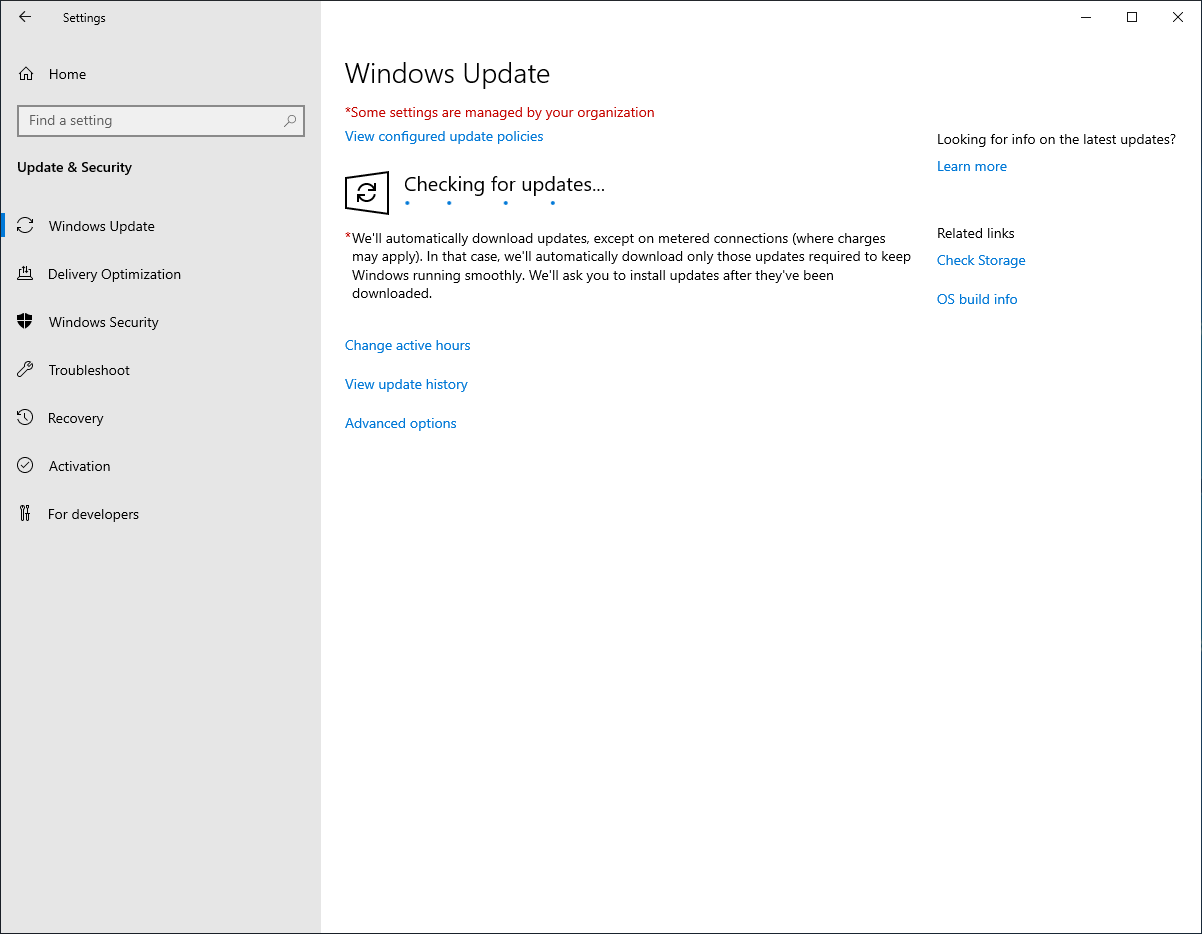
Install all available Windows Updates (picture 11):
-
Open Start.
-
Click the Settings icon.
-
Click "Update & Security".
-
Click "Check for updates".
-
Allow updates to automatically download and install.
-
Restart if required.
-
Repeat these steps until no further Windows Updates are available.
-
Open Start.

Configuring The Operating System
-
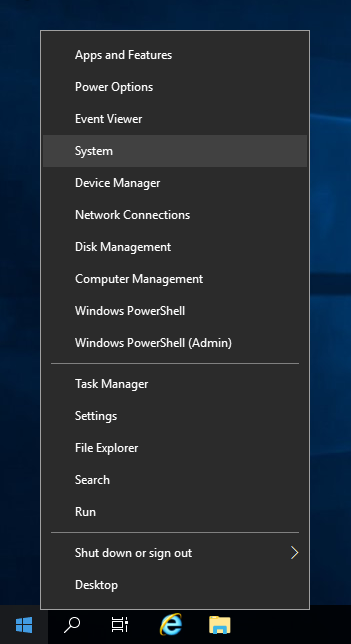
Right-click Start to open the Quick Link menu.
-
Click "System" (picture 12).
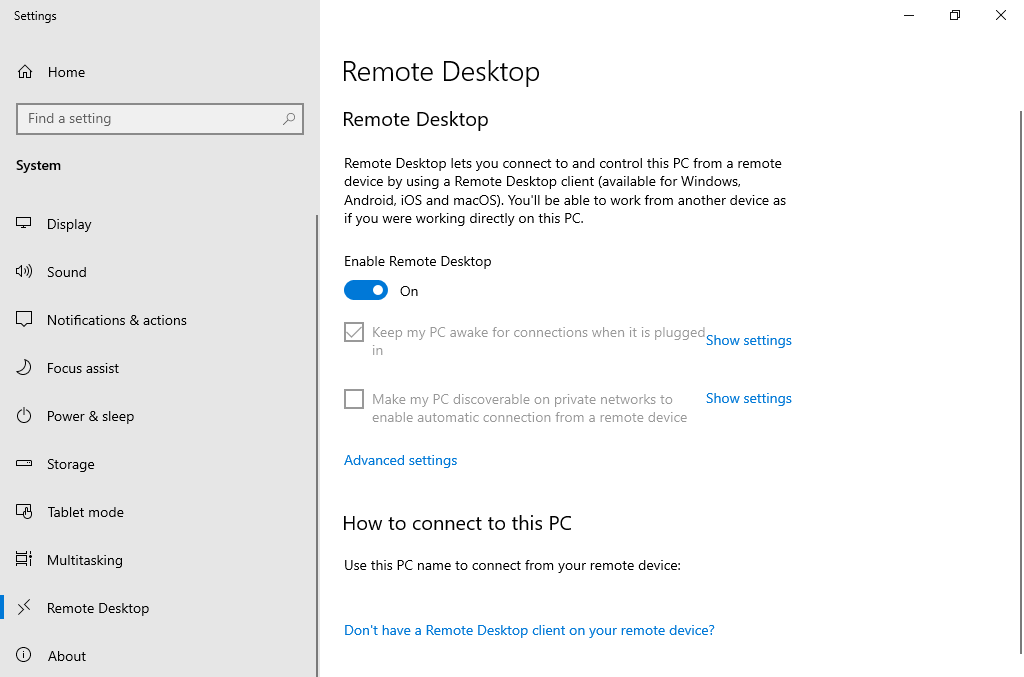
Enabling Remote Desktop
-
Click "Remote Desktop" on the left-hand side (picture 13).
-
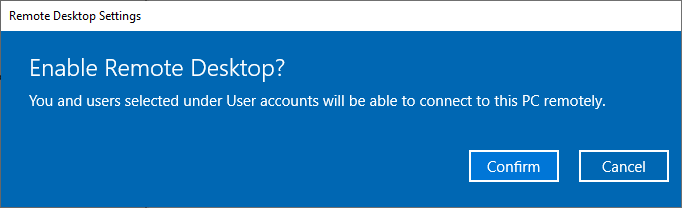
Click the "Enable Remote Desktop" toggle to "On".
-
Click "Confirm" in the dialog box (picture 14).
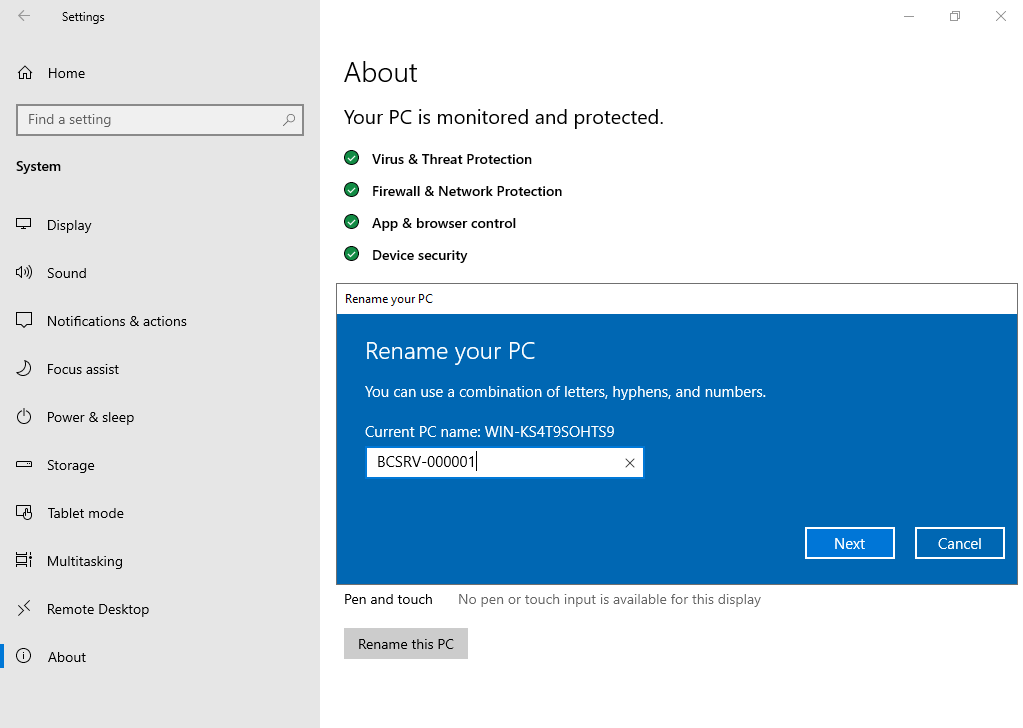
Setting The Server Name
-
Click "About".
-
Click "Rename this PC".
-
Type in the new server name using the format of
BSQLSRV-######with sequential numbering - e.g.BSQLSRV-000001(picture 15). -
Click "Next".
-
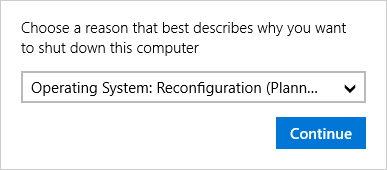
Click "Restart Now".
-
Select "Operating System: Reconfiguation (Planned)" as the reason for shut down (picture 16).
-
Click "Continue".
-
Allow the server to restart for the new name to take effect.
Accessing By Remote Desktop
The following steps can all be completed by remote desktop (optional).
To access the server by remote desktop:
From any Microsoft Windows based computer (XP or later):
-
Open “Remote Desktop Connection” from the Start Menu (often found under “Windows Accessories”)
-
OR run the command
mstscin Command Prompt or PowerShell.
-
OR run the command
-
Enter the server name.
-
Click the “Connect” button.
-
Enter the
Administratorusername. -
Enter the Administrator user password.
-
Click the “OK” button.
-
Click the “Yes” button on the security warning.
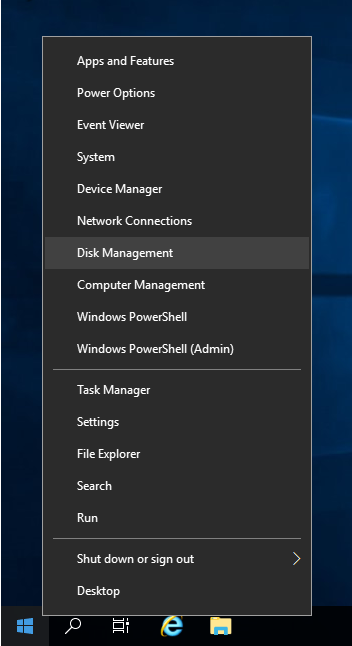
Preparing The DATA Drive
-
Right-click Start to open the Quick Link menu.
-
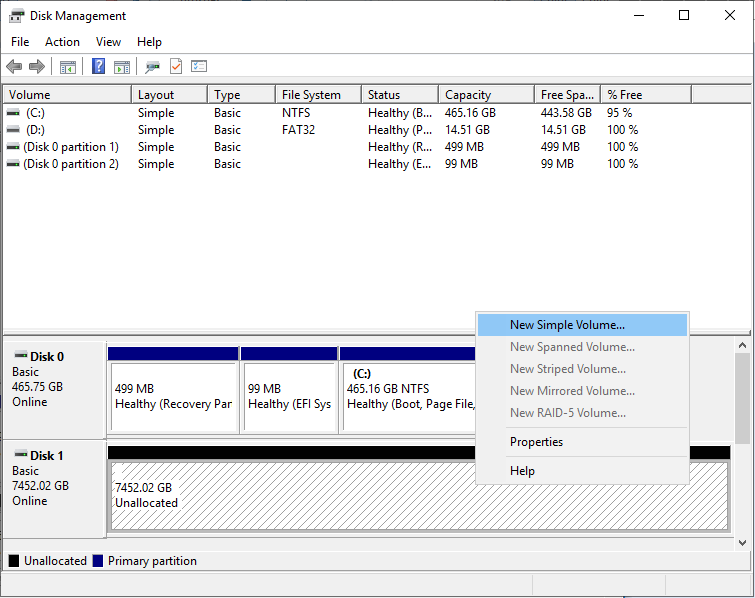
Click "Disk Management" (picture 17).
-
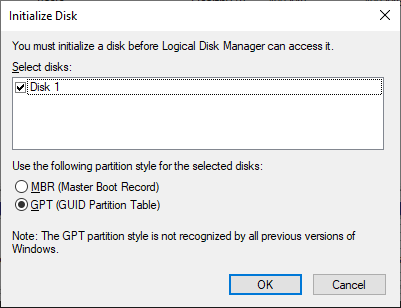
Click "OK" when prompted to initialize the data drive (the largest drive, drive 1) with the "GPT (GUID Partition Table)" partition style (picture 18).
-
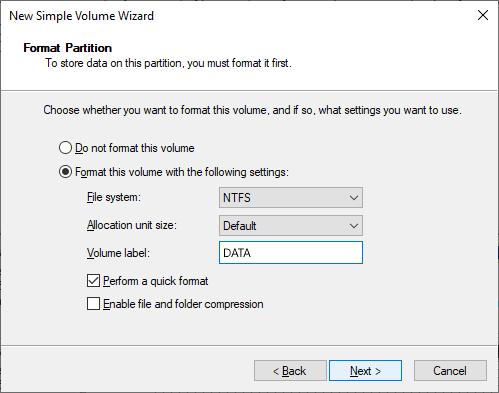
Right-click the unallocated space in the data drive area then click "New Simple Volume..." (picture 19).
-
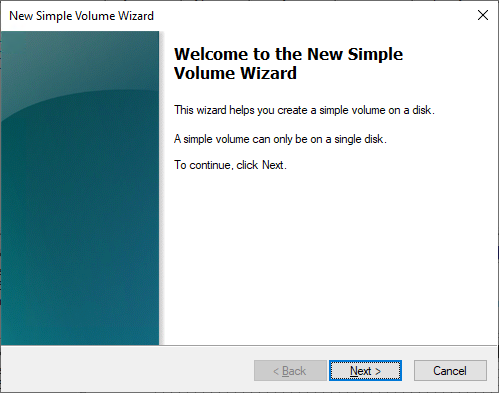
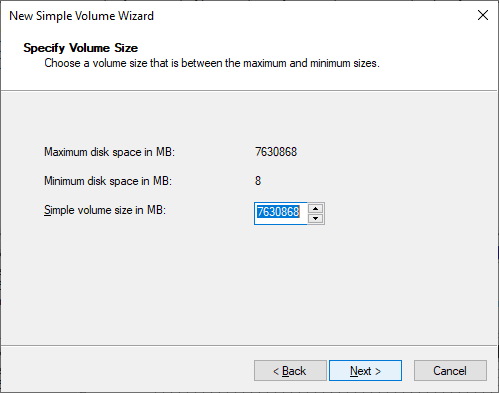
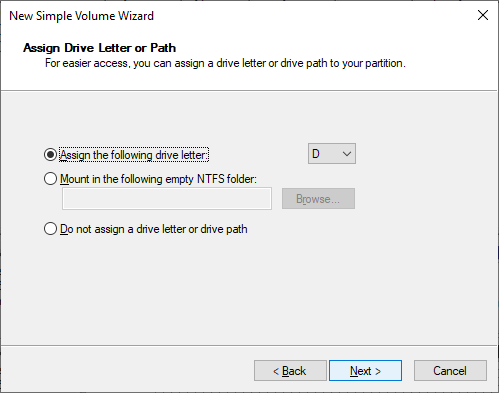
Leave settings as they are then click "Next" for the next 3 steps (picture 20, 21 and 22).
-
Enter
DATAas the volume label then click "Next" (picture 23).
-
Click "Finish".
Naming The SYSTEM Drive
-
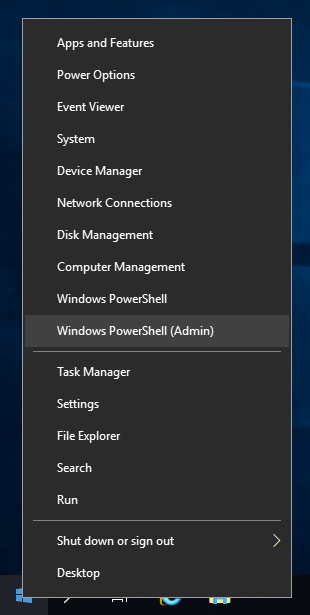
Right-click Start to open the Quick Link menu.
-
Click "Windows PowerShell (Admin)" (picture 24).
Run the following command in the PowerShell (Admin) window.
Set-Volume -DriveLetter C -NewFileSystemLabel "SYSTEM"
Creating The Data Directory Structure
Run the following commands in a PowerShell (Admin) window.
d:
mkdir databases\mssql
mkdir databases\mssql\backup
mkdir temp
mkdir virtual
mkdir virtual\bnvsrv
Installing Microsoft Hyper-V Server Role
Run the following command in a PowerShell (Admin) window.
Install-WindowsFeature -Name Hyper-V -IncludeManagementTools -Restart
Configuring File Sharing Access For Blockchain Node Shared Data
Run the following command in a PowerShell (Admin) window.
Set-ItemProperty -Path "HKLM:\SYSTEM\CurrentControlSet\Services\LanmanWorkstation\Parameters" -Name "AllowInsecureGuestAuth" -Value 1
Linux Virtual Machine Setup
Follow these instructions to setup the Ubuntu Server Linux based Blockchain Node Virtual Server.
Download Ubuntu Server LTS Linux ISO File
-
Visit https://ubuntu.com/download/server
-
Select option 2: “Manual server installation”.
-
Download the Ubuntu Server LTS Linux ISO file and save in
d:\virtual\bnvsrv.
Alternative method via PowerShell:
curl -OutFile d:\virtual\bnvsrv\ubuntu-20.04.3-live-server-amd64.iso https://mirror.internet.asn.au/pub/ubuntu/releases/20.04.3/ubuntu-20.04.3-live-server-amd64.iso
Creating Blockchain Server Virtual Network
Run the following command in a PowerShell (Admin) window.
netsh interface ipv4 show interfaces
Note the connected network interface name (e.g. Embedded LOM 1 Port 1)
Run the following command in a PowerShell (Admin) window after replacing Ethernet with the name of the connected network interface.
New-VMSwitch -name blockchainsrv-net -NetAdapterName "Ethernet" -AllowManagementOS $true
Example:
New-VMSwitch -name blockchainsrv-net -NetAdapterName "Embedded LOM 1 Port 1" -AllowManagementOS $true
Creating Blockchain Node Virtual Server
-
https://docs.microsoft.com/en-us/windows-server/virtualization/hyper-v/get-started/create-a-virtual-machine-in-hyper-v
- https://docs.microsoft.com/en-us/virtualization/hyper-v-on-windows/quick-start/create-virtual-machine
-
https://www.thomasmaurer.ch/2018/06/how-to-install-ubuntu-in-a-hyper-v-generation-2-virtual-machine/
-
https://docs.microsoft.com/en-us/powershell/module/hyper-v/set-vmfirmware?view=windowsserver2022-ps
Run the following commands in a PowerShell (Admin) window:
-
000000with the same sequential number as the Windows Server name (e.g.000001). -
ubuntu-server-lts-filename.isowith the name of the Ubuntu Server LTS Linux ISO file saved earlier.
New-VM -Name BNVSRV-000000 -MemoryStartupBytes 4GB -Path d:\virtual\bnvsrv -BootDevice VHD -NewVHDPath d:\virtual\bnvsrv\BNVSRV-000000\bnvsrv-sys.vhdx -NewVHDSizeBytes 28GB -Generation 2 -Switch blockchainsrv-net
Get-VM –VMname BNVSRV-000000| Set-VM –AutomaticStartAction Start
Add-VMScsiController -VMName BNVSRV-000000
Add-VMDvdDrive -VMName BNVSRV-000000 -ControllerNumber 1 -ControllerLocation 0 -Path d:\virtual\bnvsrv\ubuntu-server-lts-filename.iso
Set-VMFirmware -VMName BNVSRV-000000 -FirstBootDevice (Get-VMDvdDrive -VMName BNVSRV-000000)
Set-VMFirmware -VMName BNVSRV-000000 -EnableSecureBoot off
Set-VMProcessor -VMName BNVSRV-000000 -ExposeVirtualizationExtensions $true
Start-VM -Name BNVSRV-000000
VMConnect localhost BNVSRV-000000
Example:
New-VM -Name BNVSRV-000001 -MemoryStartupBytes 4GB -Path d:\virtual\bnvsrv -BootDevice VHD -NewVHDPath d:\virtual\bnvsrv\BNVSRV-000001\bnvsrv-sys.vhdx -NewVHDSizeBytes 28GB -Generation 2 -Switch blockchainsrv-net
Add-VMScsiController -VMName BNVSRV-000001
Add-VMDvdDrive -VMName BNVSRV-000001 -ControllerNumber 1 -ControllerLocation 0 -Path d:\virtual\bnvsrv\ubuntu-20.04.3-live-server-amd64.iso
Set-VMFirmware -VMName BNVSRV-000001 -FirstBootDevice (Get-VMDvdDrive -VMName BNVSRV-000001)
Set-VMFirmware -VMName BNVSRV-000001 -EnableSecureBoot off
Set-VMProcessor -VMName BNVSRV-000001 -ExposeVirtualizationExtensions $true
Start-VM -Name BNVSRV-000001
VMConnect localhost BNVSRV-000001
Installing The Operating System
-
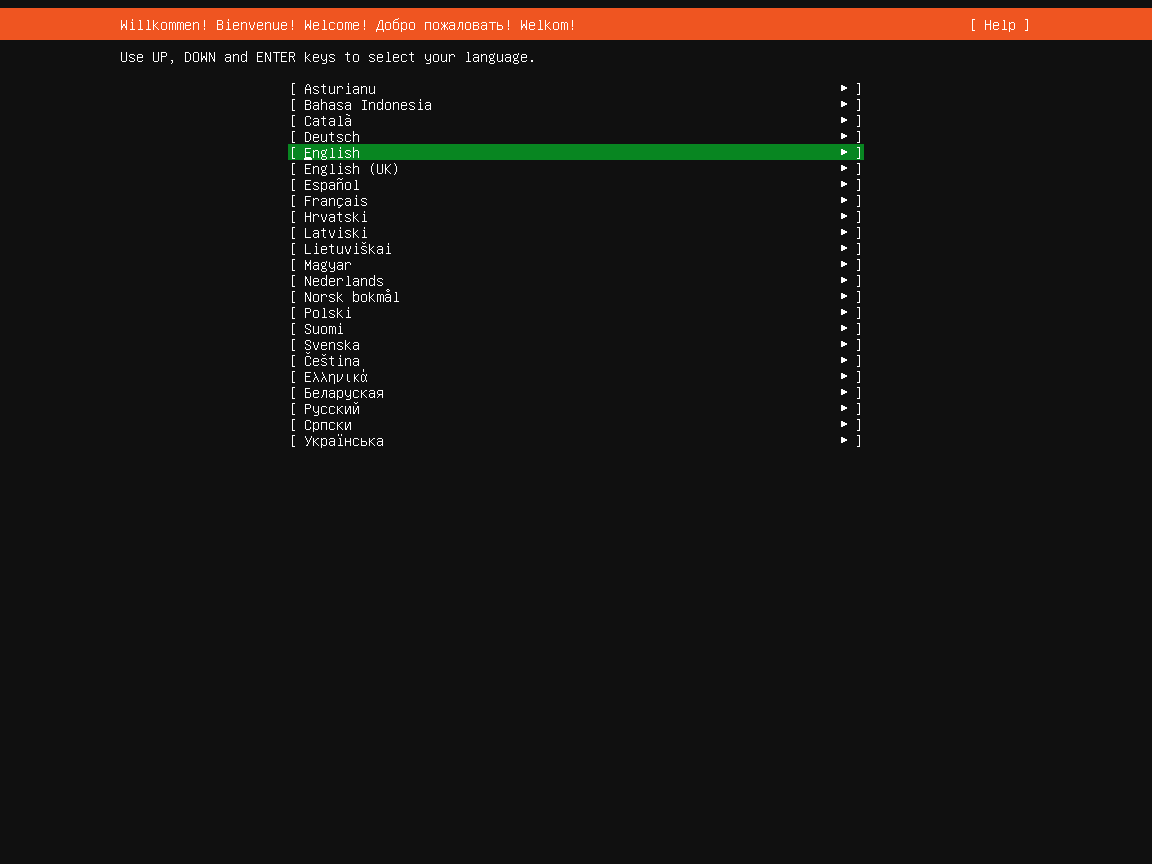
Select appropriate language (picture 25).
-
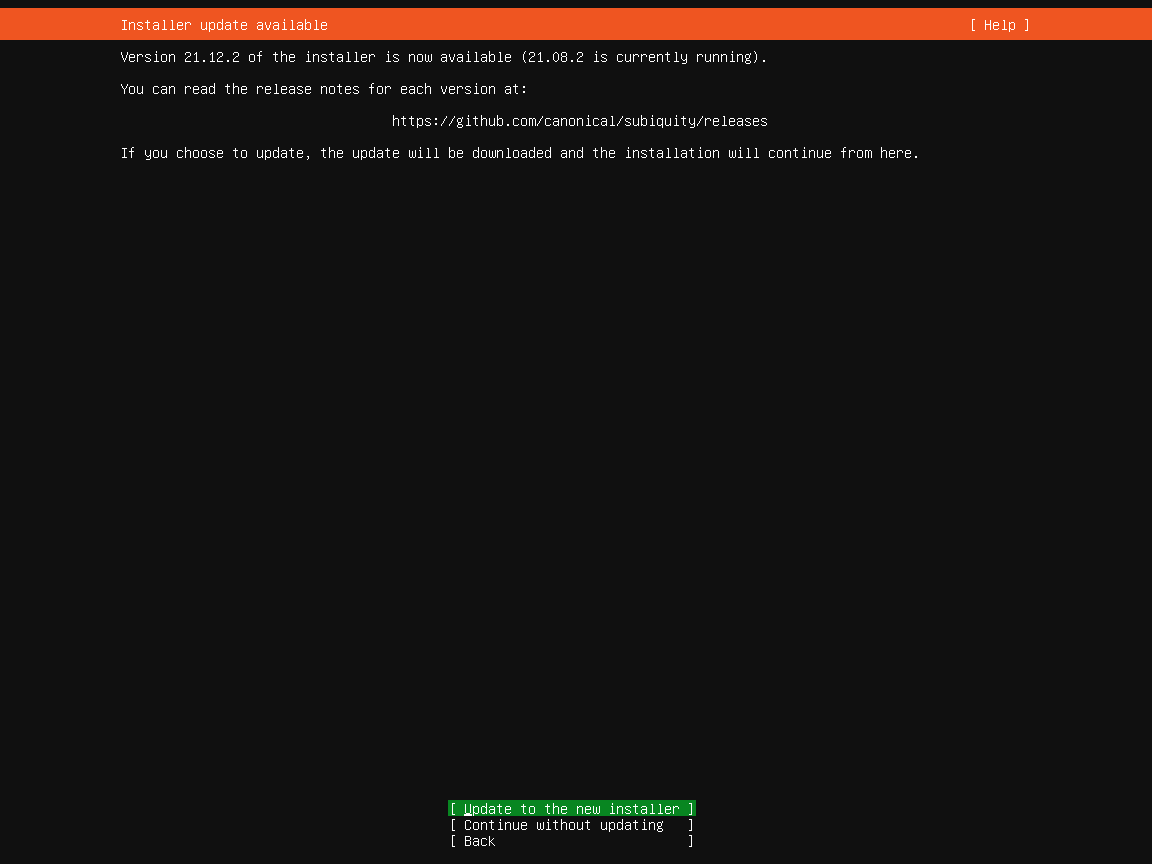
Select “Update to the new installer” and allow the update process to complete (picture 26).
-
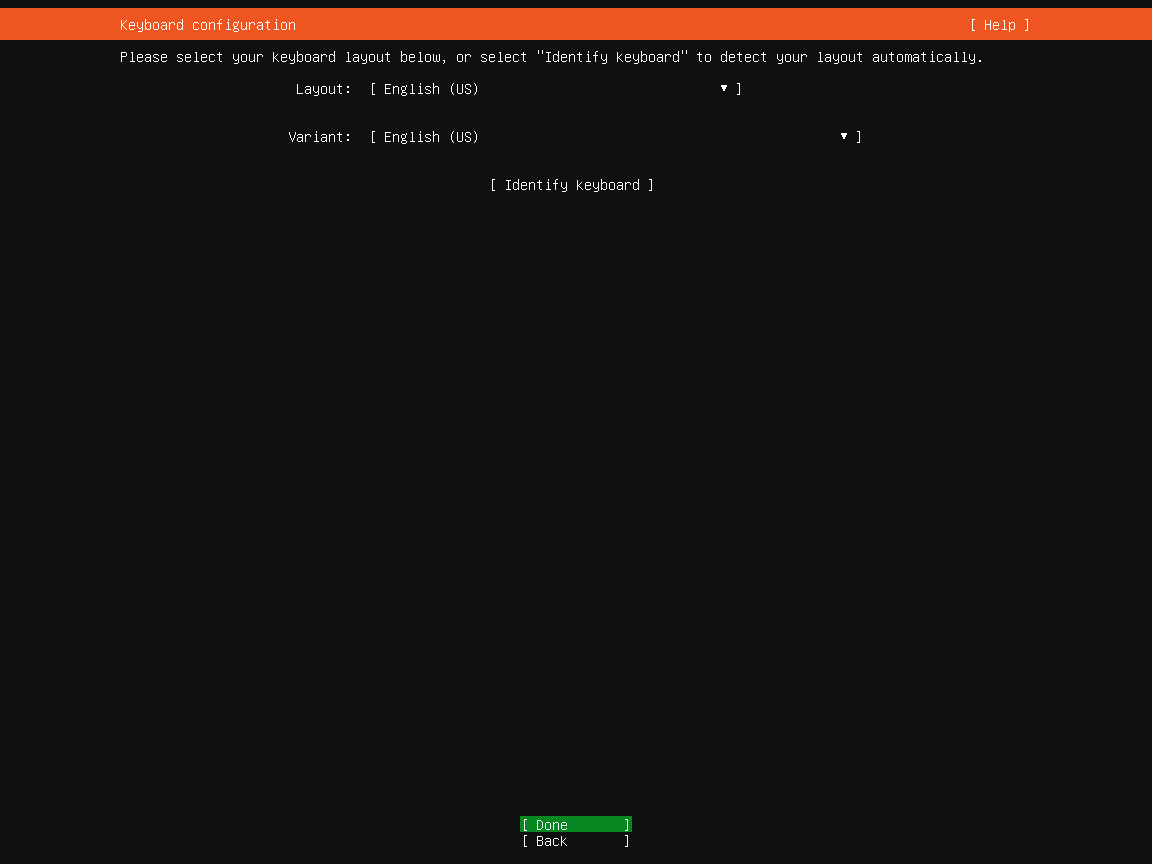
Select appropriate keyboard layout then select “Done” (picture 27).
-
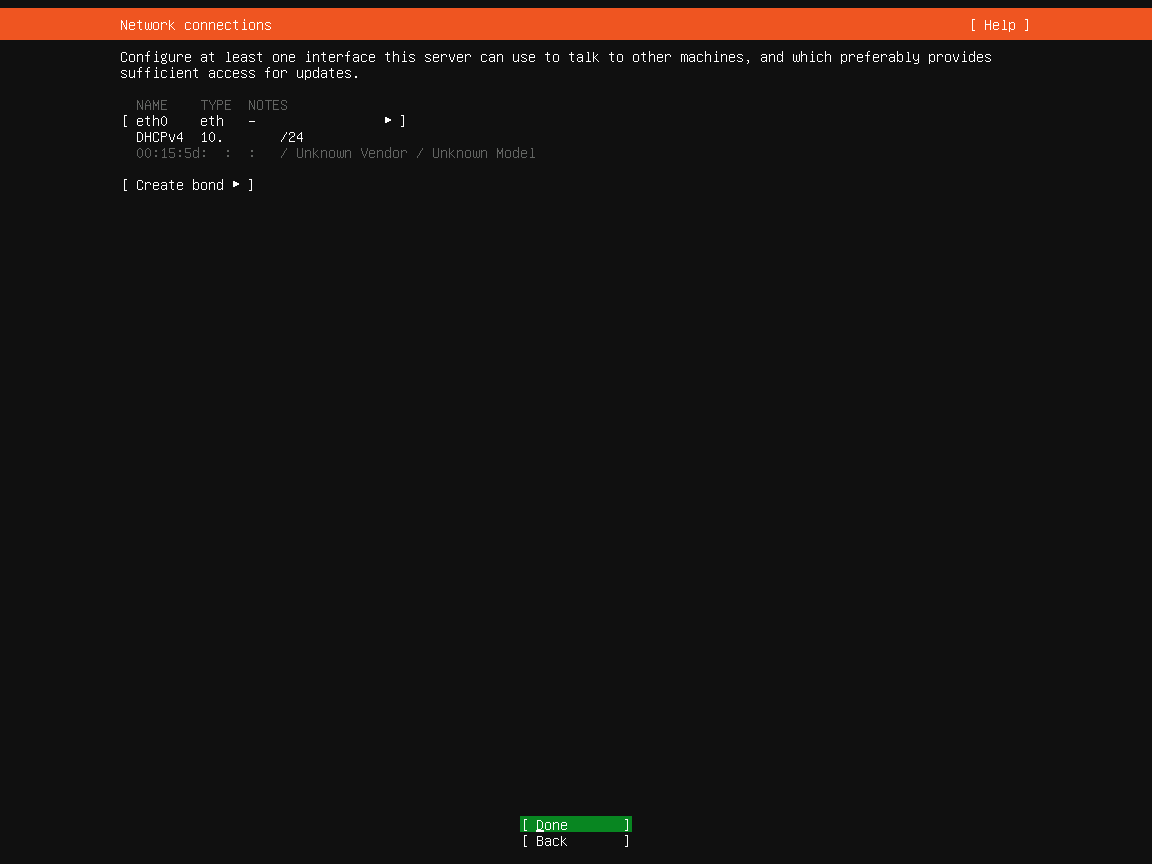
Check network settings are correct then select “Done” (picture 28).
-
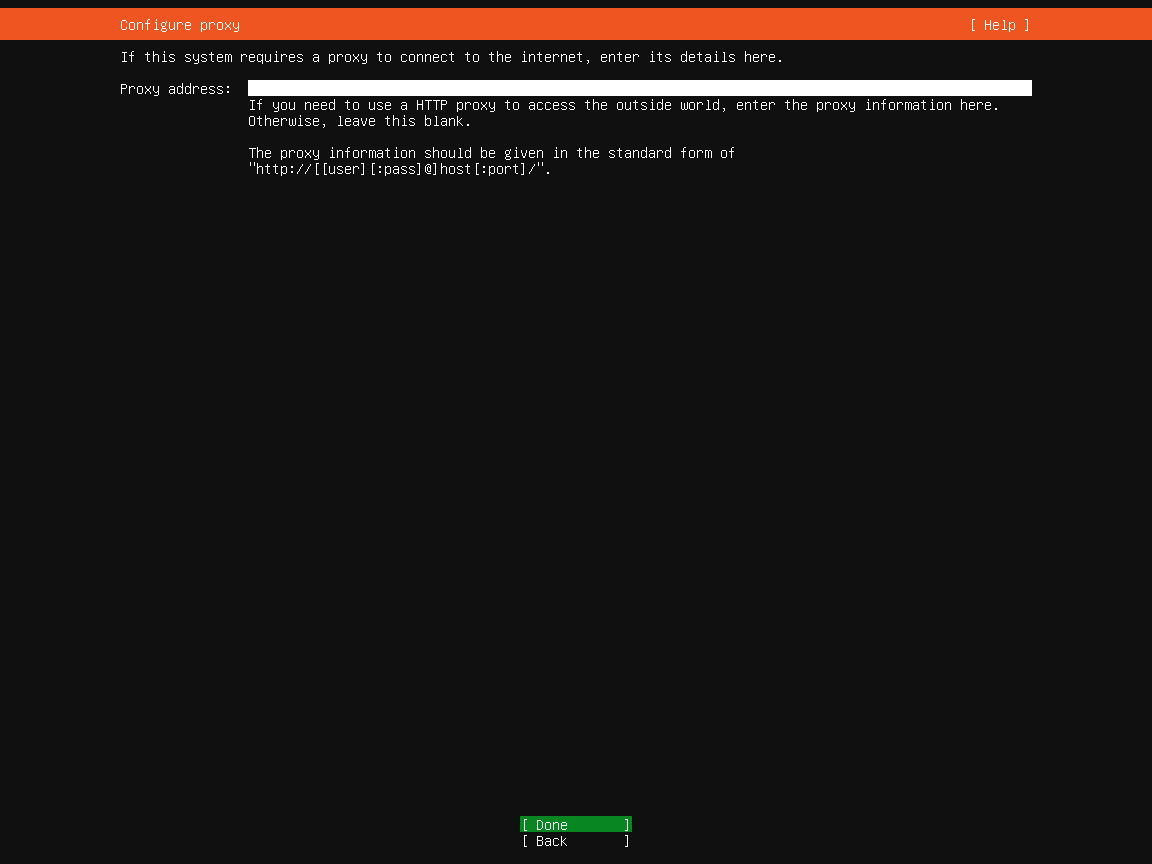
Enter proxy server address details if required otherwise leave blank then select “Done” (picture 29).
-
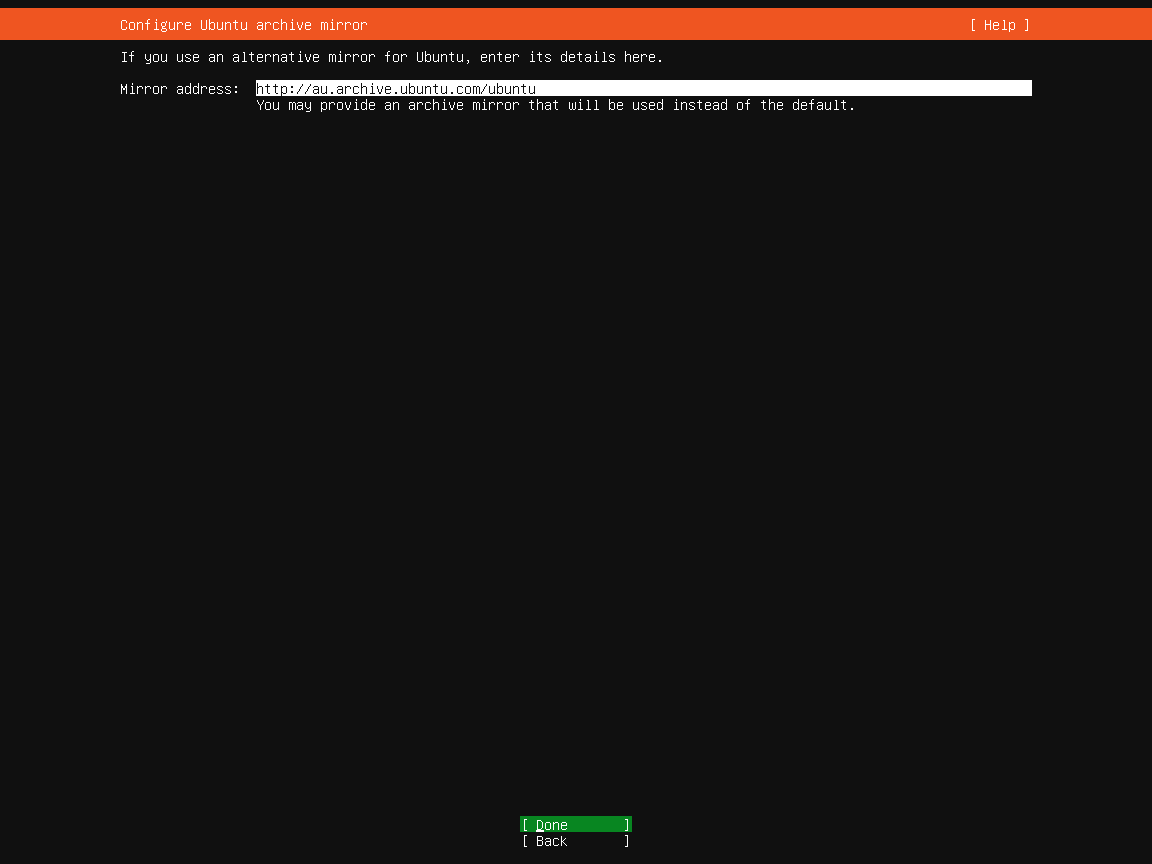
Leave the mirror address detail as the default then select “Done” (picture 30).
-
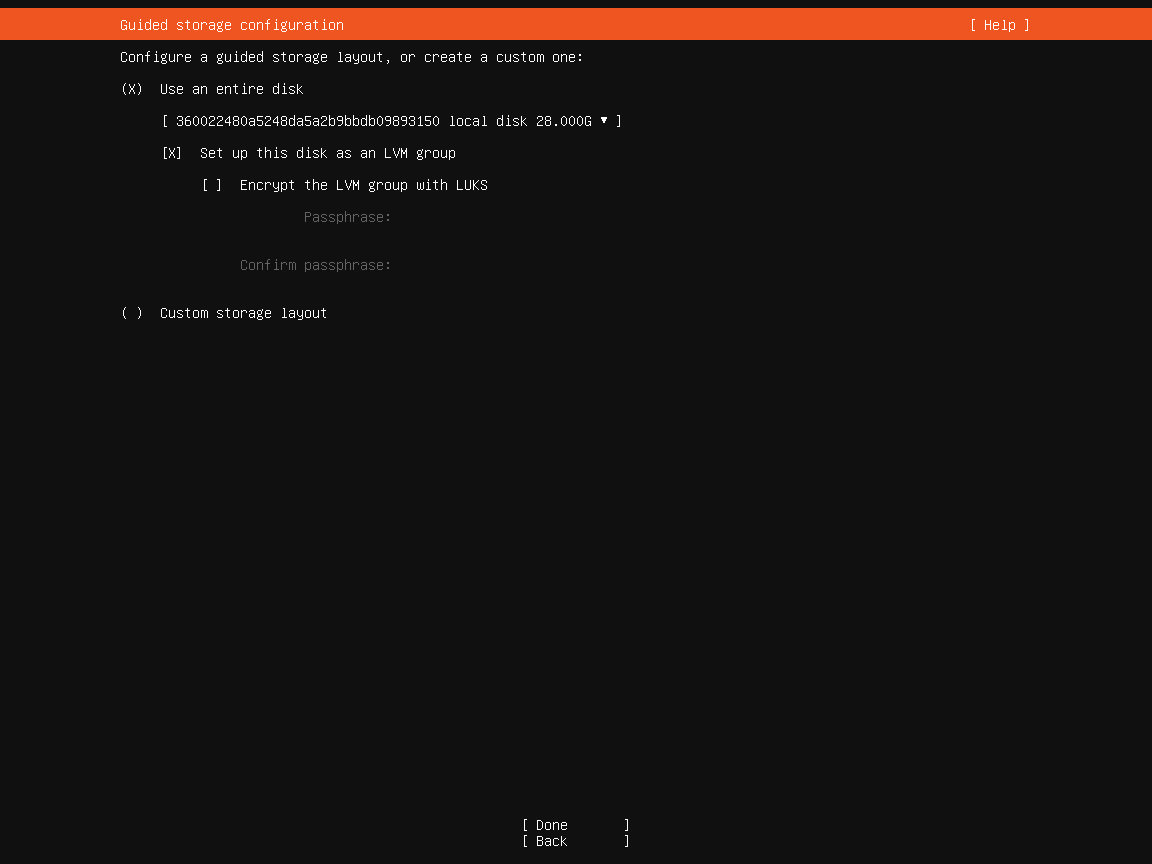
Leave the “Guided storage configuration” settings as the default then select “Done” (picture 31).
-
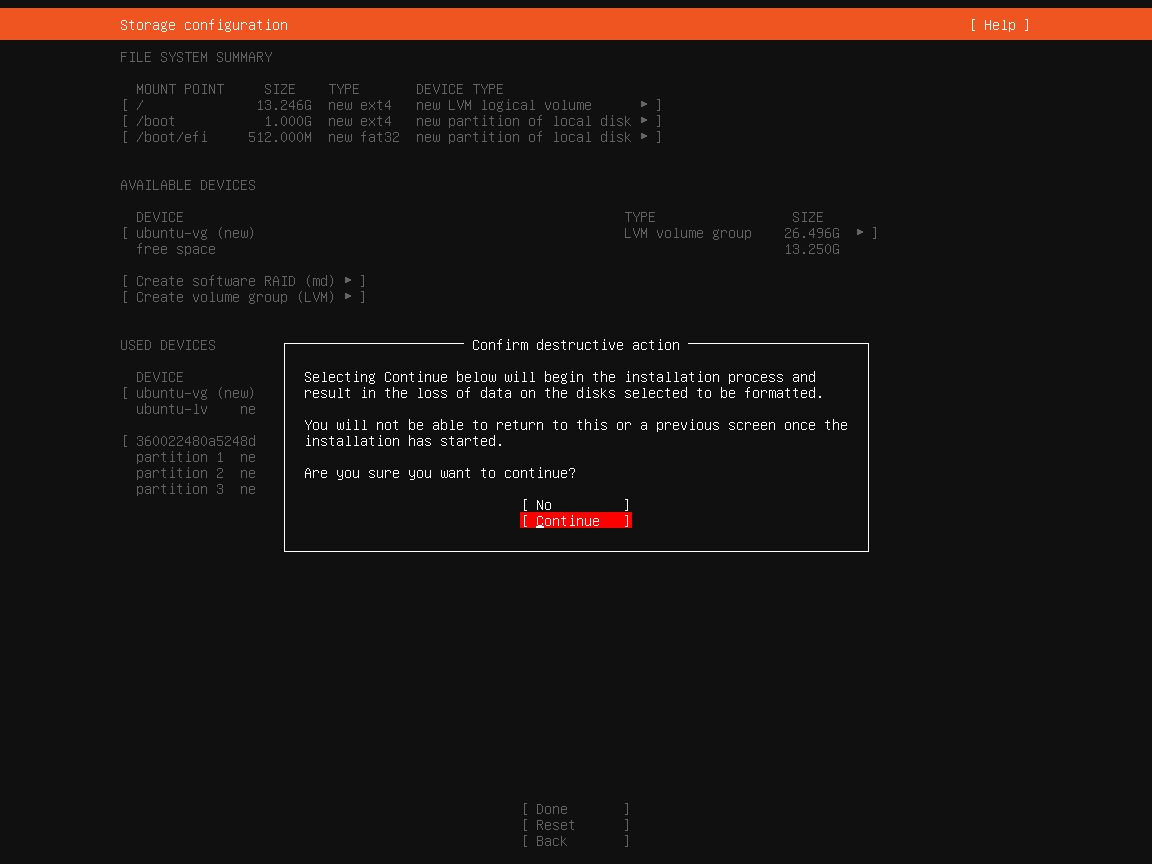
Leave the “Storage configuration” settings as the default then select “Done”.
-
When prompted to “Confirm destructive action” select “Continue” (picture 32).
-
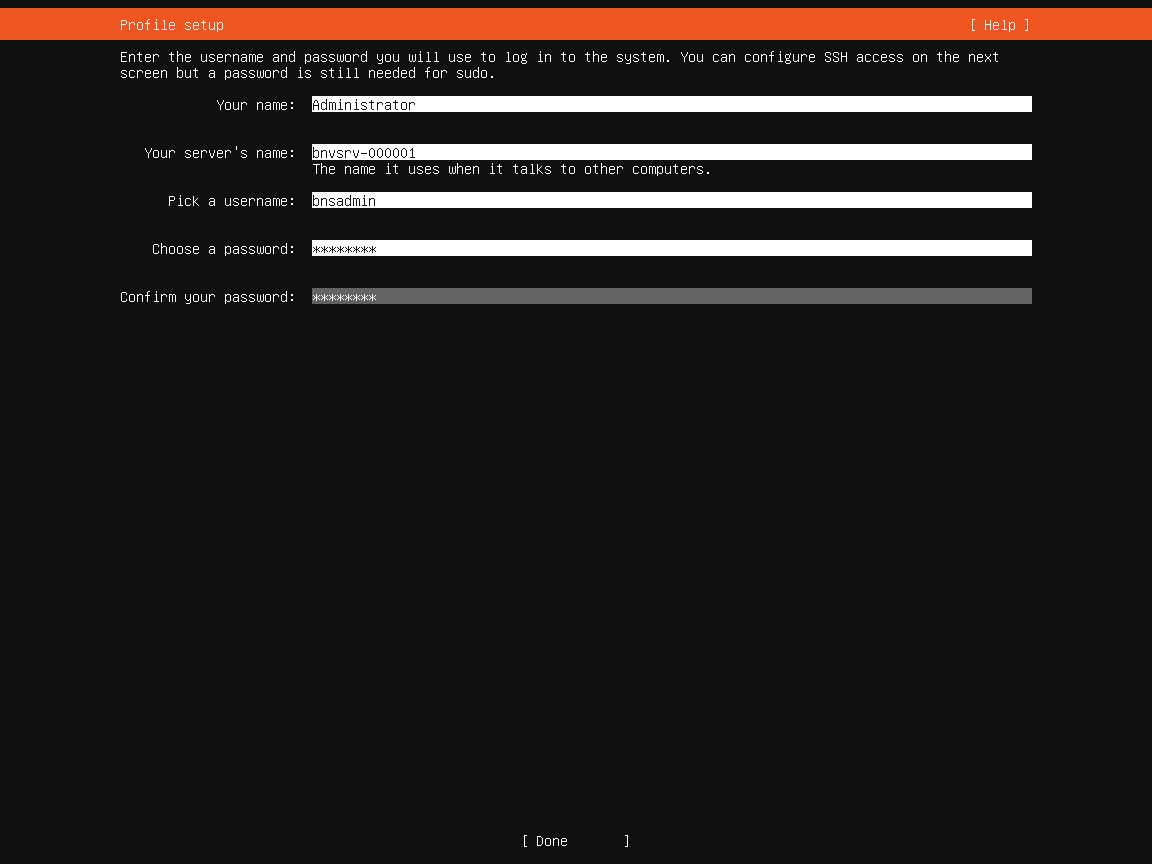
Enter the following details for the “Profile setup” (picture 33):
-
Your name:
Administrator. -
Your server’s name:
bnvsrv-000000.Replace000000with the same sequential number as the Windows Server name (e.g.000001). -
-
Pick a username:
bnsadmin. -
Enter password twice for confirmation
Make sure the
bnsadminpassword is stored somewhere securely. -
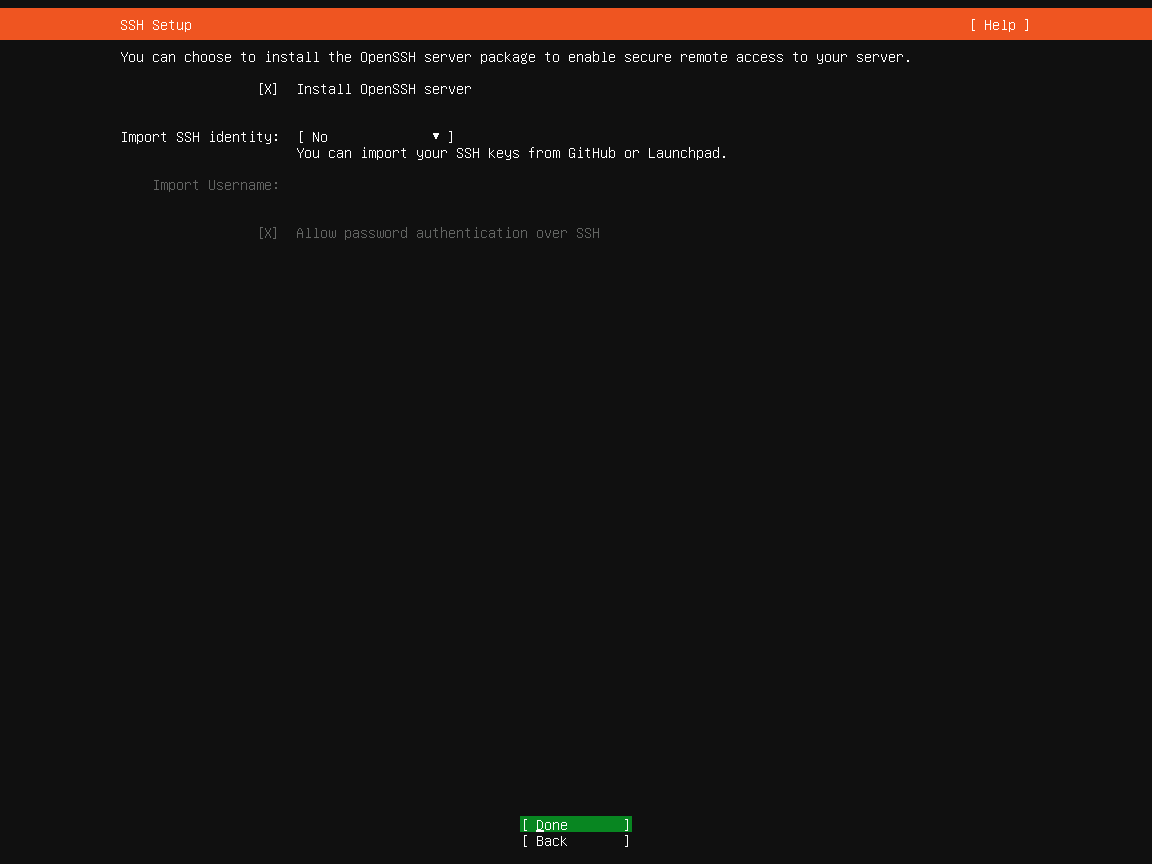
Select the checkbox next to “Install OpenSSH server” then select “Done” (picture 34).
-
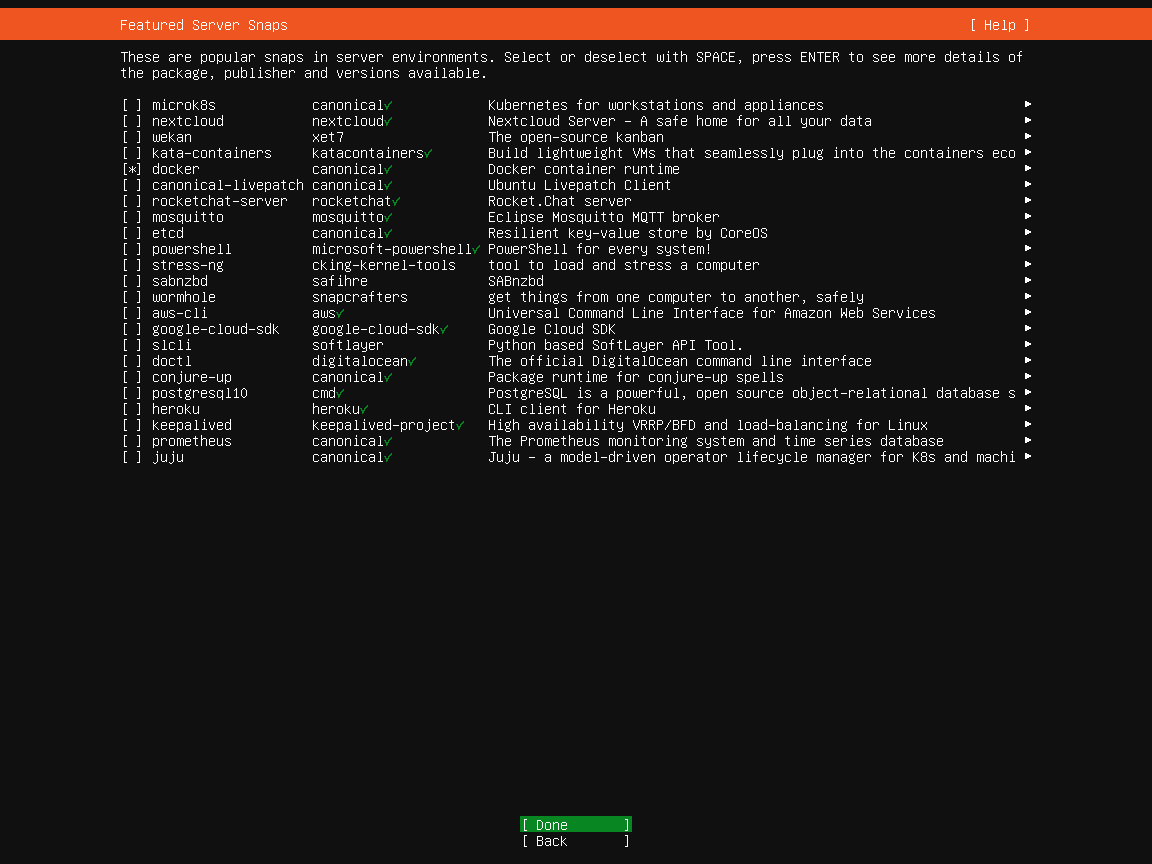
Select the checkbox next to “docker” then select “Done” (picture 35).
-
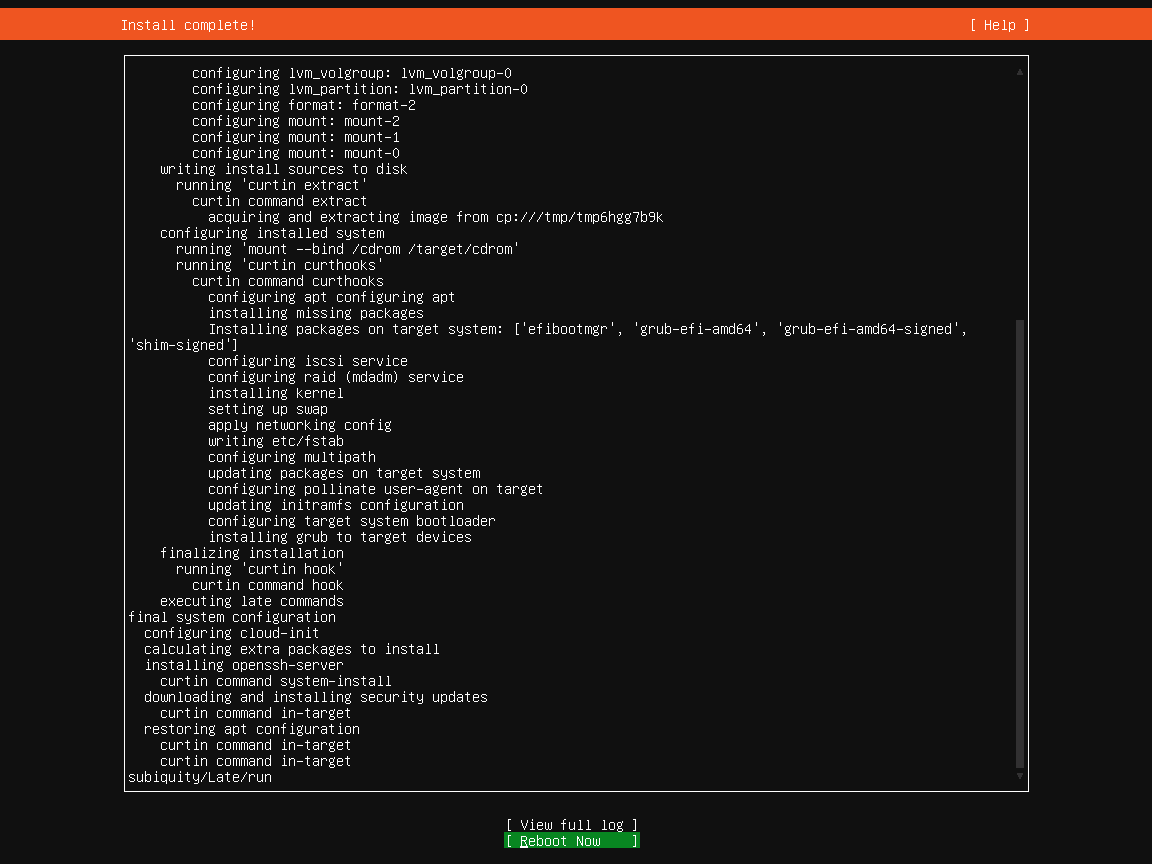
Allow the installation process to complete then select “Reboot now” when it has completed (picture 36).
-
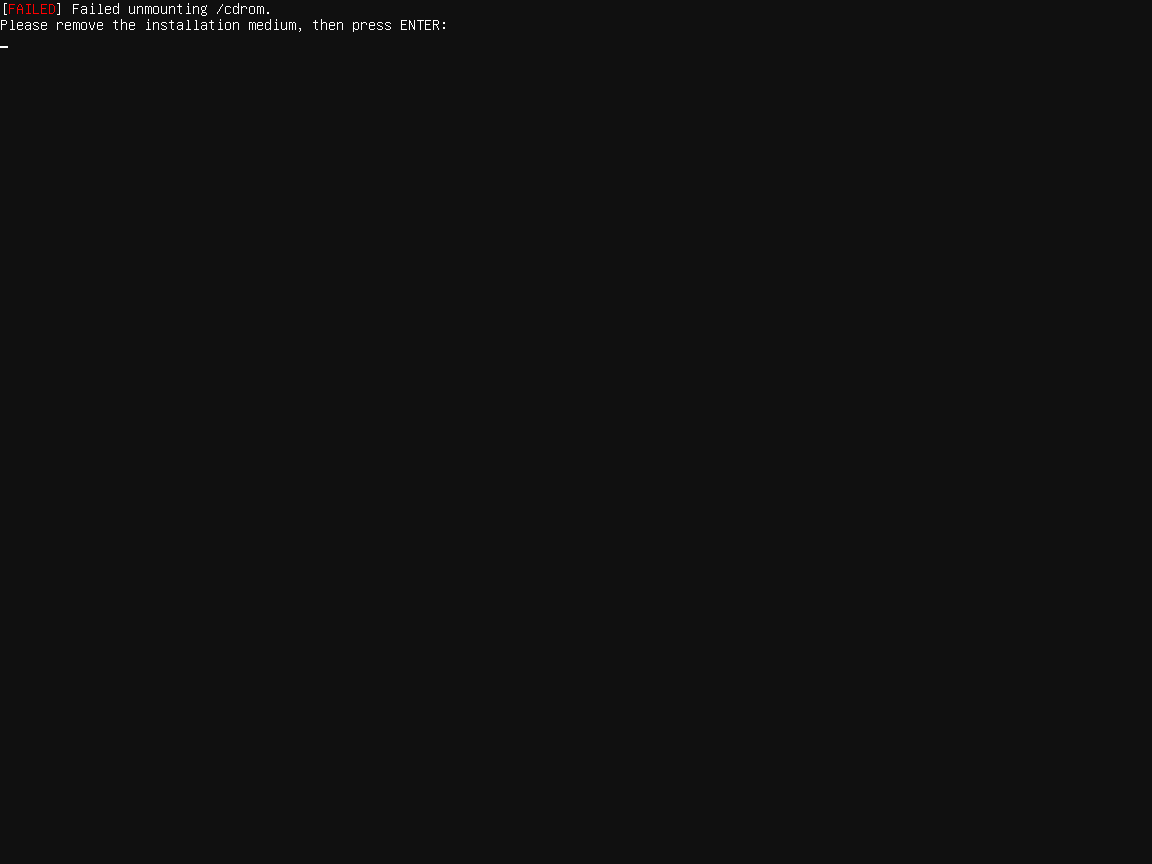
When prompted to remote the installation media press Enter (picture 37).
-
Allow the system to reboot (picture 38 and 39).
-
Your name:


Accessing By Remote Access
The following steps can all be completed by SSH remote access (optional).
To access the server by remote desktop:
-
From your operating system
-
Microsoft Windows: Open PowerShell.
-
Linux (GUI): Open Terminal.
-
Linux (CLI): Get to a bash prompt.
-
MacOS: Open Terminal
-
Microsoft Windows: Open PowerShell.
-
Run the following command:
Replace
000000with the same sequential number as the Windows Server name (e.g.000001).ssh bnsadmin@bnvsrv-000000Example:
ssh bnsadmin@bnvsrv-000001 -
Type
yeswhen prompted then pressEnter. -
Enter the bnsadmin user password then press
Enter.
Alternative Program For Remote Access From Windows
The recommended alternative program for remote access from windows is PuTTY which can be downloaded from https://www.putty.org.
Configuring The Operating System
-
Login as the
bnsadminuser. -
Remove cloud-init using the following commands (enter password when prompted):
sudo apt purge cloud-init -y sudo rm -rf /etc/cloud && sudo rm -rf /var/lib/cloud/ sudo reboot -
Allow the system to reboot.
-
Login as the
bnsadminuser. -
Set the appropriate timezone.
-
Run the following command to see a list of available timezones:
timedatectl list-timezones -
Use the following command to set the timezone (replace
TIMEZONEwith the appropriate timezone, enter password when prompted):sudo timedatectl set-timezone TIMEZONEExample:
sudo timedatectl set-timezone Australia/Brisbane
-
Run the following command to see a list of available timezones:
-
Install all available updates.
Run the following command:
sudo apt update -y && sudo apt upgrade -y -
Create the directory to store blockchain node data.
Run the following commands:
mkdir ~/blockchains
Setting Up For Blockchain Node Shared Data
The Blockchain SQL Host Server needs access to some blockchain node data.
-
Setup Samba
Run the following commands (enter password when prompted):
sudo apt install samba -y
sudo ufw allow samba
sudo smbpasswd -a bnsadmin
Enter the password for the
bnsadminuser (twice for confirmation) for the last command. -
Edit the configuration file.
-
Run the following command (enter password when prompted):
sudo nano /etc/samba/smb.conf -
Locate the
[global]and add as the last line (usually above[printers]):min protocol = SMB3_11 -
Press
Ctrl+Oto save changes (write out). -
Press
Enterto confirm the file to be saved. -
Press
Ctrl+Xto exit nano.
-
Run the following command (enter password when prompted):
-
Restart Samba
Run the following command (enter password when prompted):
sudo service smbd restart -
On the Blockchain SQL host server
Setting Up Nodes
Repeat this process for each blockchain node with a Docker container available.
Setting Up Dedicated Virtual Hard Drive (VHD)
Each blockchain node is setup with a dedicated Virtual Hard Drive (VHD) to store its data.
-
Shutdown the Blockchain Node Virtual Server.
Run the following command (enter password when prompted):sudo shutdown now -
Create a new Virtual Hard Drive (VHD) on the Blockchain SQL Host Server.
Run the following command in a PowerShell (Admin) window:
BEFORE running the following command, replace:-
000000with the same sequential number as the Windows Server name (e.g.000001). -
***with the blockchain symbol/short code (e.g. BTC for Bitcoin). -
!!!with the amount of storage required for the node data and allowing room for expansion.
New-VHD -Path d:\virtual\bnvsrv\BNVSRV-000000\bnvsrv-***.vhdx -Dynamic -SizeBytes !!!GBExample:
New-VHD -Path d:\virtual\bnvsrv\BNVSRV-000001\bnvsrv-btc.vhdx -SizeBytes 890GB -
-
Attach the new Virtual Hard Drive (VHD) to the Blockchain Node Virtual Server.
Run the following command in a PowerShell (Admin) window:
BEFORE running the following command, replace:-
000000with the same sequential number as the Windows Server name (e.g.000001). -
***with the blockchain symbol/short code (e.g. BTC for Bitcoin).
Add-VMHardDiskDrive -VMName BNVSRV-000000 -Path d:\virtual\bnvsrv\BNVSRV-000000\bnvsrv-***.vhdxExample:
Add-VMHardDiskDrive -VMName BNVSRV-000001 -Path d:\virtual\bnvsrv\BNVSRV-000001\bnvsrv-btc.vhdx -
-
Start the Blockchain Node Virtual Server.
Run the following command in a PowerShell (Admin) window:
BEFORE running the following commands, replace000000with the same sequential number as the Windows Server name (e.g.000001).Start-VM -Name BNVSRV-000000 VMConnect localhost BNVSRV-000000Example:
Start-VM -Name BNVSRV-000001 VMConnect localhost BNVSRV-000001 -
Login as the
bnsadminuser. -
Setup the new Virtual Hard Disk (VHD) in the Blockchain Node Server Virtual Machine
-
Find the new Virtual Hard Drive (VHD) logical name.
-
Run the following command (enter password when prompted):
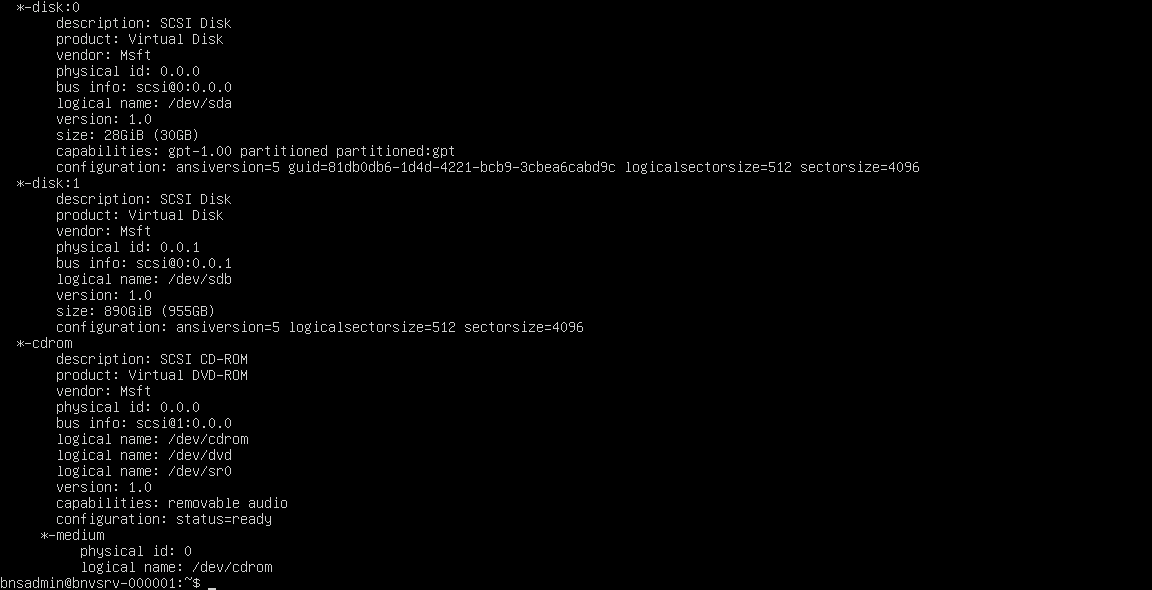
sudo lshw -C diskExample output:
-
Locate the last “*-disk:#" section (e.g.
*-disk:1) and note the information next to “logical name” (e.g./dev/sdb).
-
Run the following command (enter password when prompted):
-
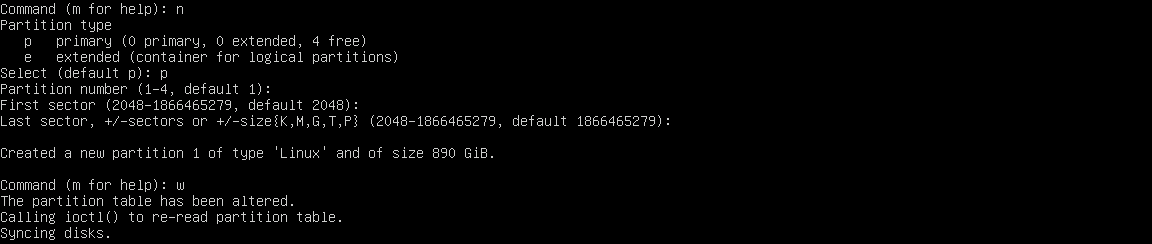
Partition the disk.
-
Run the following command (enter password when prompted):
BEFORE running the following command, replace
/logical/namewith the logical name information found previously.sudo fdisk /logical/nameExample:
sudo fdisk /dev/sdb
-
Create a new primary partition.
-
Type
nto create a new partition. -
Type
pto indicate primary partition. -
Press
Enterto accept the default partition number. -
Press
Enterto accept the default first sector. -
Press
Enterto accept the default last sector. -
Type
wto write the changes.
-
Type
-
Format the new partition
Run the following command (enter password when prompted):
BEFORE running the following command, replace/logical/namewith the logical name information found previously.sudo mkfs -t ext4 /logical/name1Example:
sudo mkfs -t ext4 /dev/sdb1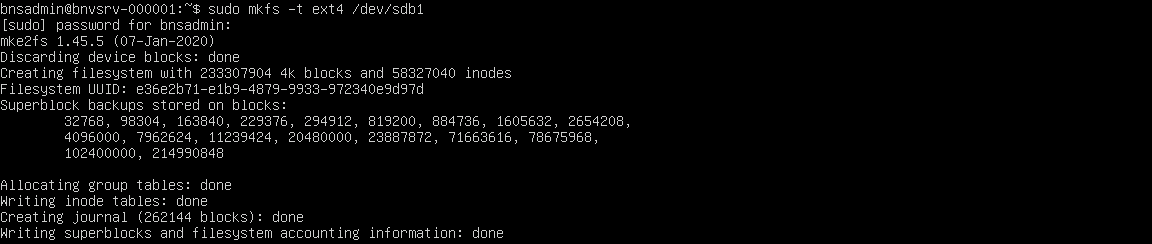
Allow the formatting process to complete.
-
Run the following command (enter password when prompted):
-
Mount the new partition.
-
Create an empty directory to use as the mount point.
Run the following command:
BEFORE running the following command, replace***with the blockchain symbol/short code (e.g. BTC for Bitcoin).mkdir ~/blockchains/***Example:
mkdir ~/blockchains/btc -
Manually mount the new partition.
Run the following command (enter password when prompted):
BEFORE running the following command, replace:-
/logical/namewith the logical name information found previously. -
***with the blockchain symbol/short code (e.g. BTC for Bitcoin).
sudo mount /logical/name1 ~/blockchains/***Example:
sudo mount /dev/sdb1 ~/blockchains/btc -
-
Setup automatic mounting of the new partition at startup.
-
Edit the /etc/fstab file using
nano.Run the following command (enter password when prompted):
sudo nano -Bw /etc/fstab -
Add as the last line:
BEFORE running the following command, replace:
-
/logical/namewith the logical name information found previously. -
***with the blockchain symbol/short code (e.g. BTC for Bitcoin).
/logical/name /home/bnsadmin/blockchains/*** ext4 defaults 0 2Example:
/dev/sdb1 /home/bnsadmin/blockchains/btc ext4 defaults 0 2 -
-
Press
Ctrl+Oto save changes (write out). -
Press
Enterto confirm the file to be saved and create a backup copy. -
Press
Ctrl+Xto exit nano.
-
Edit the /etc/fstab file using
-
Create an empty directory to use as the mount point.
-
Set permissions of the newly mounted partition.
Run the following command (enter password when prompted):
BEFORE running the following command, replace:***with the blockchain symbol/short code (e.g. BTC for Bitcoin).sudo chown -R bnsadmin:bnsadmin ~/blockchains/***Example:
sudo chown -R bnsadmin:bnsadmin ~/blockchains/btc
-
Find the new Virtual Hard Drive (VHD) logical name.
-
Create the directory structure.
Run the following command:
BEFORE running the following commands, replace:***with the blockchain symbol/short code (e.g. BTC for Bitcoin).mkdir ~/blockchains/***/audit mkdir ~/blockchains/***/node mkdir ~/blockchains/***/proxy mkdir ~/blockchains/***/proxy/conf mkdir ~/blockchains/***/proxy/logsExample:
mkdir ~/blockchains/btc/audit
mkdir ~/blockchains/btc/node
mkdir ~/blockchains/btc/proxy
mkdir ~/blockchains/btc/proxy/conf
mkdir ~/blockchains/btc/proxy/logs
Setting Up Internal Docker Network
Each blockchain node is setup with a separate internal Docker network for security.
Run the following command (enter password when prompted):
-
***with the blockchain symbol/short code (e.g. BTC for Bitcoin). -
A unique combination of numbers for use with the current blockchain node:
-
!with the same number between 1 and 16. -
? with the same number between 1 and 255.
-
Note this combination for future use.
-
sudo docker network create \
--driver=bridge \
--subnet=172.!.?.0/24 \
--gateway=172.!.?.254 \
node-net-***
Example:
sudo docker network create \
--driver=bridge \
--subnet=172.24.1.0/24 \
--gateway=172.24.1.254 \
node-net-btc
Setting Up Blockchain Node
Setup and run the Docker container for the blockchain node.
Run the following command (enter password when prompted):
-
***with the blockchain symbol/short code (e.g. BTC for Bitcoin). -
The previously used combination of numbers for use with the current blockchain node:
-
!with the same number between 1 and 16. -
? with the same number between 1 and 255.
-
-
$$$$with the port number for API access. -
%%%%with the public port number for the node. -
CONFIGVAR=VALUEwith any configuration variable and value required or remove this line if not needed. -
provider/namewith the details of the Docker container to be used for the blockchain node.
-
--volume- If more than one data storage location is required. -
--expose- If more than one API port is required. -
-p- If more than one public port is required. -
-e- If more than one configuration variable and value is required.
Make sure that there is a \ at the end of each additional line.
sudo docker run -d \
--name=node-*** \
--restart=always \
--volume ~/blockchains/***/node:/node/data/path \
--network="node-***-btc" \
--ip="172.!.?.2" \
--expose $$$$ \
-p "%%%%:%%%%" \
-e CONFIG=VALUE \
provider/image
Example:
sudo docker run -d \
--name=node-btc \
--restart always \
--volume ~/blockchains/btc/node:/bitcoin/.bitcoin \
--network="node-net-btc" \
--ip="172.24.1.2" \
--expose 8332 \
-p "8333:8333" \
-e DISABLEWALLET=1 \
sphere10software/node-btc
Managing Blockchain Node
These commands are for managing the blockchain node Docker container and do not necessarily need to be run as part of the setup process. They are included for reference only.
Run the following commands (enter password when prompted):
*** with the blockchain symbol/short code (e.g. BTC for Bitcoin).
-
Start the blockchain node Docker container.
sudo docker start node-***Example:
sudo docker start node-btc -
Stop the blockchain node Docker container.
sudo docker stop node-***Example:
sudo docker stop node-btc -
See the last 50 output lines from the blockchain node Docker container.
docker logs --tail 50 node-***Example:
docker logs --tail 50 node-btc -
Follow the blockchain node Docker container live.
docker logs --follow node-***Example:
docker logs --follow node-btc
Setting Up Reverse Proxy For Blockchain Node
Setup and run the Docker container for the OpenResty (NGINX + extension modules) reverse proxy for API access to the blockchain node.
-
Create an empty configuration file.
Run the following command:
BEFORE running the following command, replace:***with the blockchain symbol/short code (e.g. BTC for Bitcoin).touch ~/blockchains/***/proxy/conf/nginx.confExample:
touch ~/blockchains/btc/proxy/conf/nginx.conf -
Edit the configuration file.
-
Run the following command:
BEFORE running the following command, replace:
***with the blockchain symbol/short code (e.g. BTC for Bitcoin).nano ~/blockchains/***/proxy/conf/nginx.confExample:
nano ~/blockchains/btc/proxy/conf/nginx.conf -
Fill the text file with the configuration:
Replace:
-
***with the blockchain symbol/short code (e.g. BTC for Bitcoin). -
The previously used combination of numbers for use with the current blockchain node:
-
!with the same number between 1 and 16. -
? with the same number between 1 and 255.
-
-
$$$$with the port number for API access.
error_log  /var/log/nginx/nginx-error.log  warn;

log_format	main		'$remote_addr - $remote_user [$time_local] "$request" '
				'$status $body_bytes_sent "$http_referer" '
				'"$http_user_agent" "$http_x_forwarded_for"';

log_format	apirequest	'$remote_addr - $remote_user [$time_local] "$request" '
				'$status $body_bytes_sent bytes sent | Request body: $request_body';

server { set $response_body ""; }
log_format	apiresponse	'$remote_addr - $remote_user [$time_local] "$request" '
				'$status $body_bytes_sent bytes sent | Response body: $response_body';

server {
	listen       172.!.?.1:$$$$;
	server_name	proxy-***;

				access_log	/var/log/nginx/***/api-access.log		main;
        access_log	/var/log/nginx/***/api-request.log		apirequest;
        access_log	/var/log/nginx/***/api-response.log		apiresponse;

        lua_need_request_body on;

        body_filter_by_lua '
            local response_body = string.sub(ngx.arg[1], 1, 1000)
            ngx.ctx.buffered = (ngx.ctx.buffered or "") .. response_body
            if ngx.arg[2] then
                ngx.var.response_body = ngx.ctx.buffered
            end
        ';

	location / {
		proxy_set_header Host $host;
    proxy_set_header X-Real-IP $remote_addr;
		proxy_buffering off;
		proxy_pass http://172.!.?.2:$$$$;
	}
}
Example:
error_log /var/log/nginx/nginx-error.log warn; log_format main '$remote_addr - $remote_user [$time_local] "$request" ' '$status $body_bytes_sent "$http_referer" ' '"$http_user_agent" "$http_x_forwarded_for"'; log_format apirequest '$remote_addr - $remote_user [$time_local] "$request" ' '$status $body_bytes_sent bytes sent | Request body: $request_body'; server { set $response_body ""; } log_format apiresponse '$remote_addr - $remote_user [$time_local] "$request" ' '$status $body_bytes_sent bytes sent | Response body: $response_body'; server { listen 172.24.1.1:8332; server_name proxy-btc; access_log /var/log/nginx/btc/api-access.log main; access_log /var/log/nginx/btc/api-request.log apirequest; access_log /var/log/nginx/btc/api-response.log apiresponse; lua_need_request_body on; body_filter_by_lua ' local response_body = string.sub(ngx.arg[1], 1, 1000) ngx.ctx.buffered = (ngx.ctx.buffered or "") .. response_body if ngx.arg[2] then ngx.var.response_body = ngx.ctx.buffered end '; location / { proxy_set_header Host $host; proxy_set_header X-Real-IP $remote_addr; proxy_buffering off; proxy_pass http://172.24.1.2:8332; } } -
-
Press
Ctrl+Oto save changes (write out). -
Press
Enterto confirm the file to be saved. -
Press
Ctrl+Xto exit nano.
-
Run the following command:
-
Setup and run the Docker container for OpenResty (NGINX + extension modules).
Run the following command (enter password when prompted):
Replace:-
***with the blockchain symbol/short code (e.g. BTC for Bitcoin). -
The previously used combination of numbers for use with the current blockchain node:
-
!with the same number between 1 and 16. -
? with the same number between 1 and 255.
-
-
$$$$with the port number for API access.
sudo docker run -d \
--name=proxy-*** \
--restart always \
--volume ~/blockchains/***/proxy/conf:/etc/nginx/conf.d \
--volume ~/blockchains/***/proxy/logs:/var/log/nginx \
--volume ~/blockchains/***/audit:/var/log/nginx/*** \
--network="node-net-***" \
--ip="172.!.?.1" \
-p $$$$:$$$$ \
openresty/openresty
Example:
sudo docker run -d \ --name=proxy-btc \ --restart always \ --volume ~/blockchains/btc/proxy/conf:/etc/nginx/conf.d \ --volume ~/blockchains/btc/proxy/logs:/var/log/nginx \ --volume ~/blockchains/btc/audit:/var/log/nginx/btc \ --network="node-net-btc" \ --ip="172.24.1.1" \ -p 8332:8332 \ openresty/openresty -
Managing Reverse Proxy
These commands are for managing the reverse proxy Docker container and do not necessarily need to be run as part of the setup process. They are included for reference only.
Run the following commands (enter password when prompted):
*** with the blockchain symbol/short code (e.g. BTC for Bitcoin).
-
Start the reverse Docker container.
sudo docker start proxy-***Example:
sudo docker start proxy-btc -
Stop the reverse Docker container.
sudo docker stop proxy-***Example:
sudo docker stop proxy-btc -
Errors can be found in
~/blockchains/***/proxy/logs/nginx-error.logExample:
~/blockchains/btc/proxy/logs/nginx-error.log
Blockchain Node API Audit Logs
Three (3) audit logs are kept for each blockchain on the Blockchain Node Virtual Server:
*** with the blockchain symbol/short code (e.g. BTC for Bitcoin).
-
Basic access:
~/blockchains/***/audit/api-access.log(e.g.~/blockchains/btc/audit/api-access.log) -
Request body:
~/blockchains/***/audit/api-request.log(e.g.~/blockchains/btc/audit/api-request.log) -
Response body:
~/blockchains/***/audit/api-response.log(e.g.~/blockchains/btc/audit/api-response.log)
Setting Up Blockchain Node Shared Data
-
Edit the Samba configuration file.
-
Run the following command (enter password when prompted):
sudo nano /etc/samba/smb.conf -
Add at the end of the configuration file:
Replace:
-
***with the blockchain symbol/short code (e.g. BTC for Bitcoin). -
datafolderwith the name of the folder with block data (usually “blocks”)-
Ensure that no *.conf files are contained within the
datafolderfolder
-
Ensure that no *.conf files are contained within the
[***-data]
	path = /home/bnsadmin/blockchains/***/node/datafolder
	read only = yes
	browsable = yes

[***-audit]
	path = /home/bnsadmin/blockchains/***/audit
	read only = yes
	browsable = yes
Example:
[btc-data] path = /home/bnsadmin/blockchains/btc/node/blocks read only = yes browsable = yes [btc-audit] path = /home/bnsadmin/blockchains/btc/audit read only = yes browsable = yes -
-
Press
Ctrl+Oto save changes (write out). -
Press
Enterto confirm the file to be saved. -
Press
Ctrl+Xto exit nano.
-
Run the following command (enter password when prompted):
-
Restart Samba
Run the following command (enter password when prompted):
sudo service smbd restart
Windows Server Host Software Setup
Follow these instructions on the Windows Server Host to setup the software.
Installing Microsoft .NET Runtime
Run the following commands in a PowerShell (Admin) window.
Change to temp directory to work from here.
cd d:\temp
Download and install the Microsoft .NET 5 runtime.
curl -OutFile dotnet-hosting-5.0.9-win.exe https://download.visualstudio.microsoft.com/download/pr/a0f49856-eec9-4962-8d81-b09af6be9435/1d5fc0083b7f7e10ebed181329ca88ae/dotnet-hosting-5.0.9-win.exe
.\dotnet-hosting-5.0.9-win.exe /quiet
curl -OutFile windowsdesktop-runtime-5.0.9-win-x64.exe https://download.visualstudio.microsoft.com/download/pr/8bc41df1-cbb4-4da6-944f-6652378e9196/1014aacedc80bbcc030dabb168d2532f/windowsdesktop-runtime-5.0.9-win-x64.exe
.\windowsdesktop-runtime-5.0.9-win-x64.exe /quiet
Run the following commands after allowing time for installation to complete (approximately 5-10 minutes):
rm dotnet-hosting-5.0.9-win.exe
rm windowsdesktop-runtime-5.0.9-win-x64.exe
Installing Microsoft SQL Server
Run the following commands in a PowerShell (Admin) window.
Change to temp directory to work from here.
cd d:\temp
Download and run the Microsoft SQL Server Developer Edition setup file.
curl -OutFile SQL2019-SSEI-Dev.exe https://go.microsoft.com/fwlink/?linkid=866662
.\SQL2019-SSEI-Dev.exe /IAcceptSqlServerLicenseTerms /Quiet /Verbose /Action=Install /Language=en-US /InstallPath="c:\Program Files\Microsoft SQL Server"
Example:
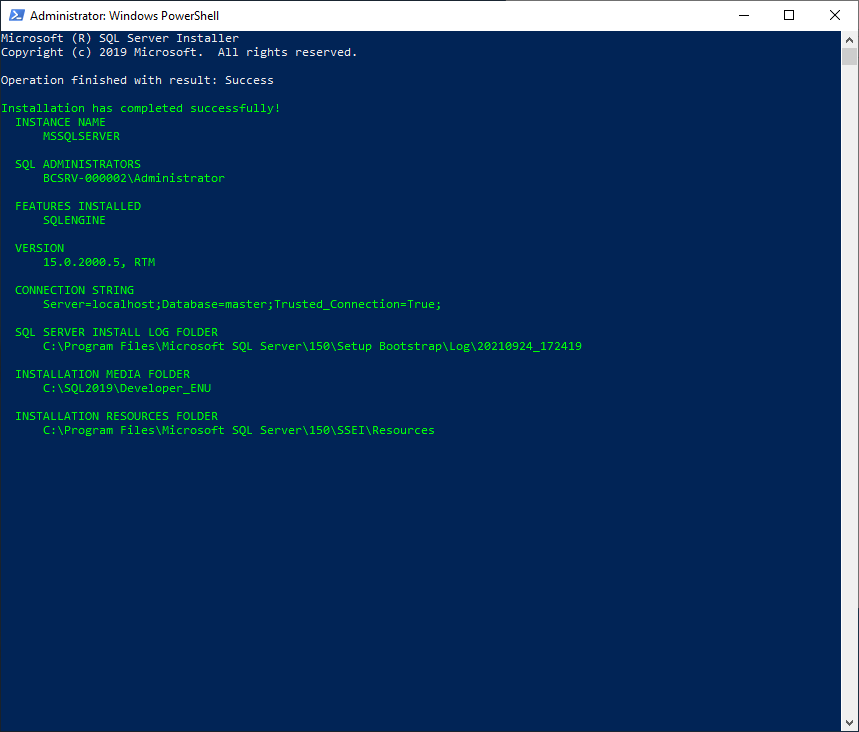
Remove the setup file after installation.
rm SQL2019-SSEI-Dev.exe
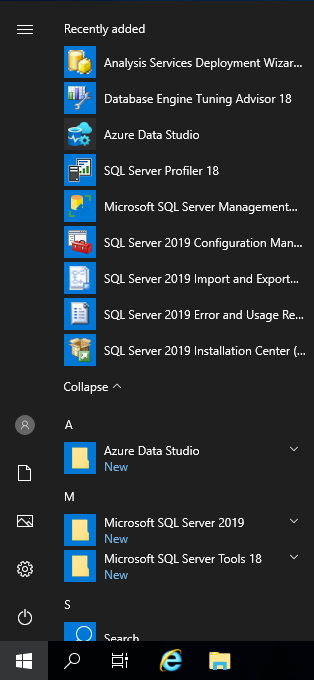
Installing Microsoft SQL Server Management Studio
Run the following commands in a PowerShell (Admin) window.
curl -OutFile SSMS-Setup-ENU.exe https://aka.ms/ssmsfullsetup
.\SSMS-Setup-ENU.exe /install /quiet
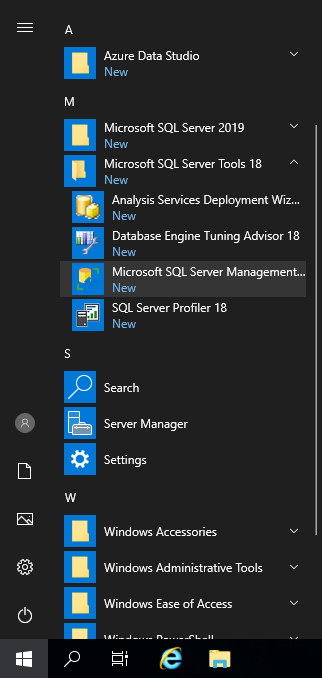
Wait for installation to finish. Check the Start Menu for Microsoft SQL Server Tools icons to show completed installation (Picture 41l).
Remove the setup file after installation.
rm SSMS-Setup-ENU.exe
Configuring Microsoft SQL Server
-
Launch Microsoft SQL Server Management Studio 18 from the Start Menu (Picture 42).
-
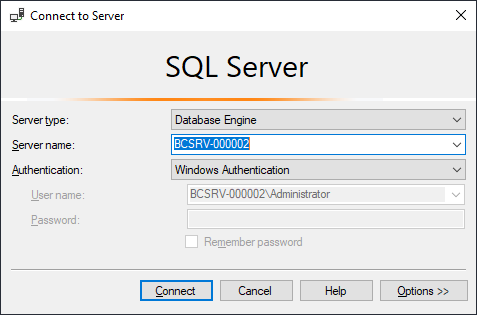
Connect to SQL Server by clicking "Connect" in the "Connect to Server" window (Picture 43).
Configuring Authentication
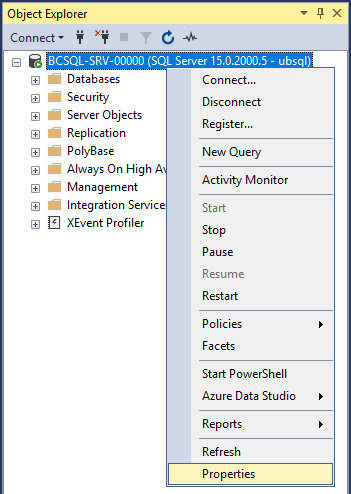
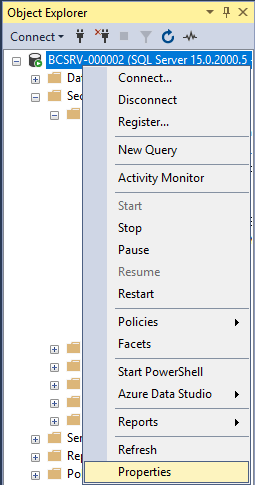
In the Object Explorer in the left-hand column (Picture 44):
-
Right-click on the SQL Server.
-
Click "Properties".
-
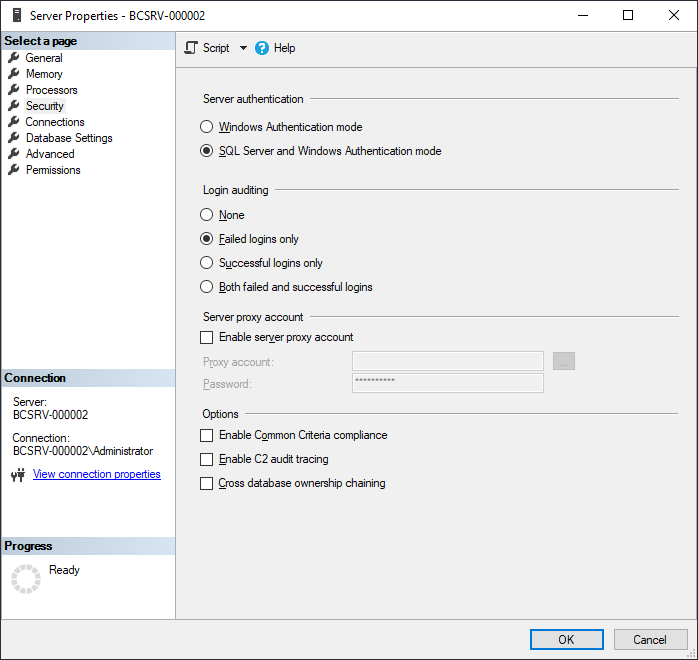
Click "Security" in the left-hand column of the window that opens (Picture 45).
-
Under the "Server Authentication" section, click the "SQL Server and Windows Authentication mode" radio button (Picture 46).
-
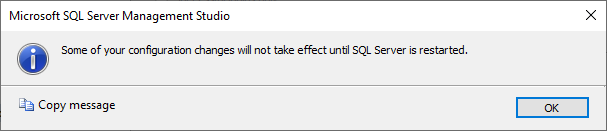
Click "OK" and click "OK" in the dialog box.
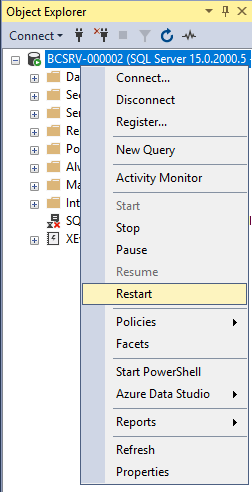
-
Right-click on the SQL Server in the Object Explorer in the left-hand column and click "Restart" (Picture 47).
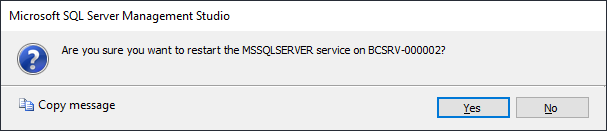
-
Click "Yes" in the restart confirmation dialog box (Picture 48).
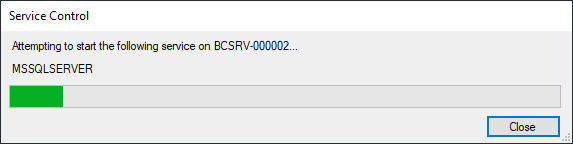
-
Wait for SQL Server to restart (Picture 49).
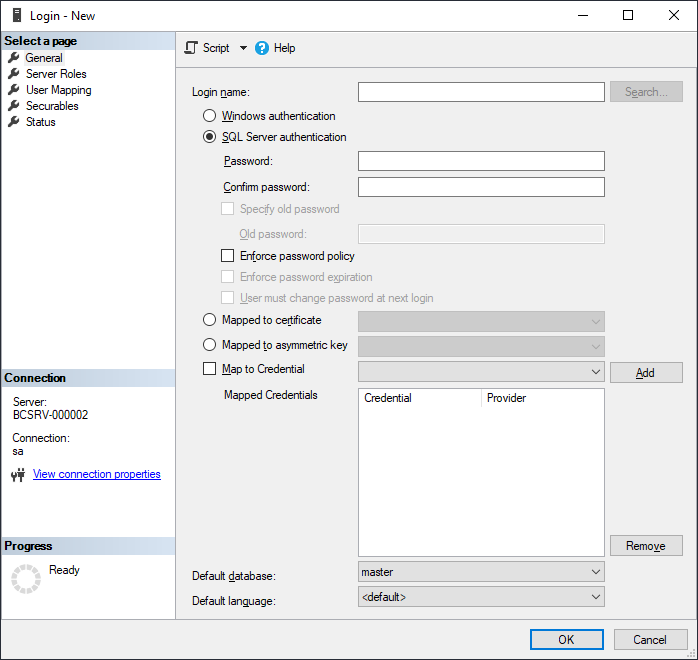
Setting Up "sa" User
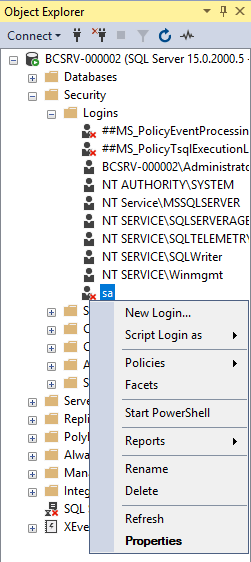
In the Object Explorer in the left-hand column (Picture 50):
-
Click "+" next to "Security".
-
Click "+" next to "Logins".
-
Right-click "sa".
-
Click "Properties".
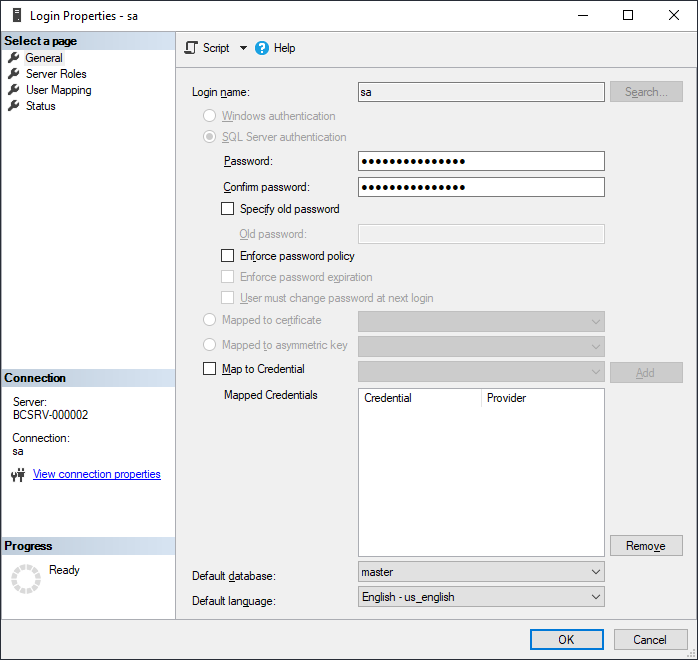
In the "sa" user properties window (Picture 51):
-
Enter a new password.
-
Enter the new password again to confirm.
-
Record the new password somewhere securely.
-
Un-check "Enforce password policy".
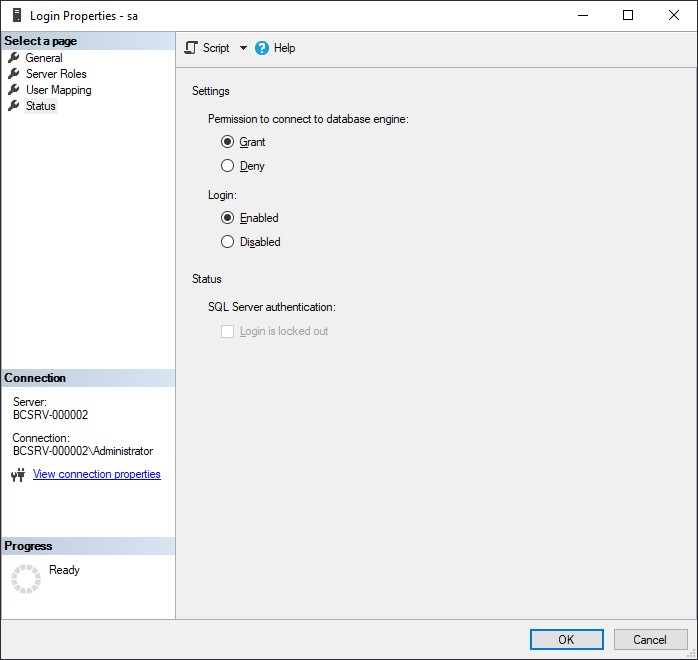
-
Click "Status" (Picture 52).
-
Click the "Enabled" radio button.
-
Click "OK".
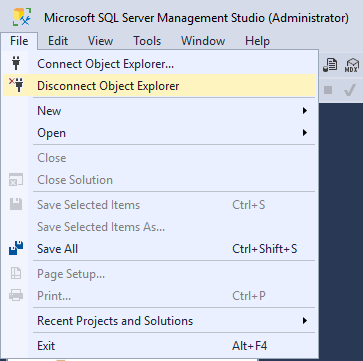
Connecting as "sa" User
-
Click "File" (Picture 53).
-
Click "Disconnect Object Explorer".
-
Click "File" (Picture 53).
-
Click "Connect Object Explorer...".
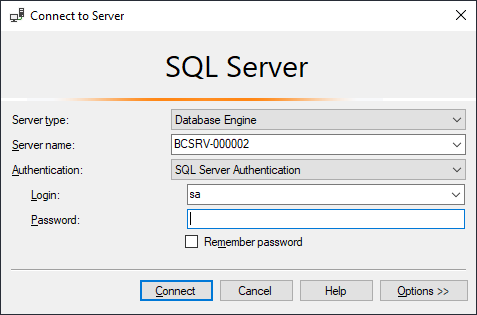
In the Connect to SQL Server window (Picture 54):
-
Select "SQL Server Authentication" from the "Authentication" drop-down list.
-
Enter
sain the "Login" field. -
Enter the password in the "Password" field.
-
Click "Connect".
sa password is stored somewhere securely.
Disabling Local Administrator Account in SQL Server
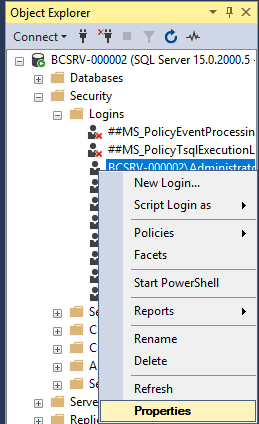
In the Object Explorer in the left-hand column (Picture 55):
-
Click "+" next to "Security".
-
Click "+" next to "Logins".
-
Right-click "<SERVER-NAME>\Administrator".
-
Click "Properties".
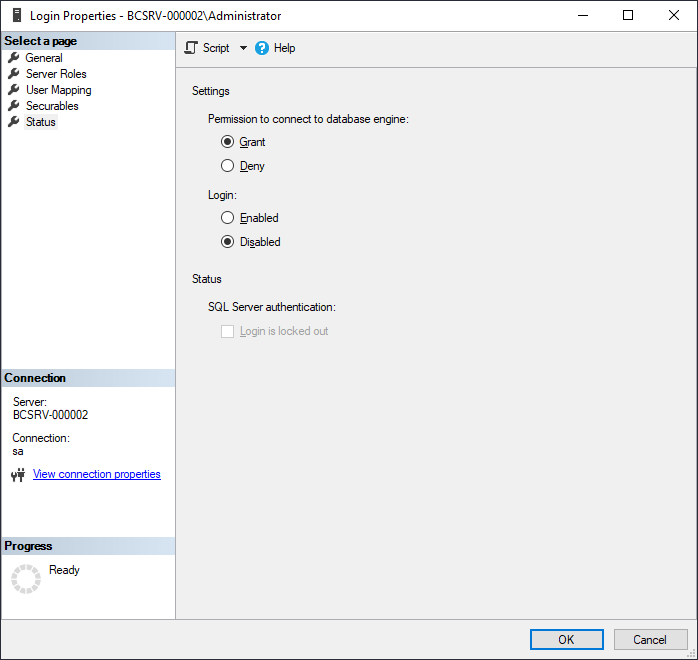
In the "<SERVER-NAME>\Administrator" user properties window:
-
Click "Status" (Picture 56).
-
Click the "Disabled" radio button.
-
Click "OK".
Creating Users in SQL Server
Create 2 users for the following roles:
-
service_username(e.g. ubsql_srvc) -
web_username(e.g. ubsql_www)
Record the usernames somewhere securely and use where service_username and web_username are referred to below.
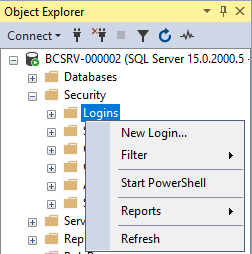
In the Object Explorer on the left-hand side (Picture 57):
-
Click "+" next to "Security".
-
Right-click "Logins".
-
Click "New Login...".
In the "New Login" window (Picture 58):
-
Enter the username as the "Login name".
-
Click the "SQL Server authentication" radio button.
-
Enter a new password.
-
Enter the new password again to confirm.
-
Record the new password somewhere securely.
-
Un-check "Enforce password policy".
-
Click "OK".
-
Repeat for each user being created.
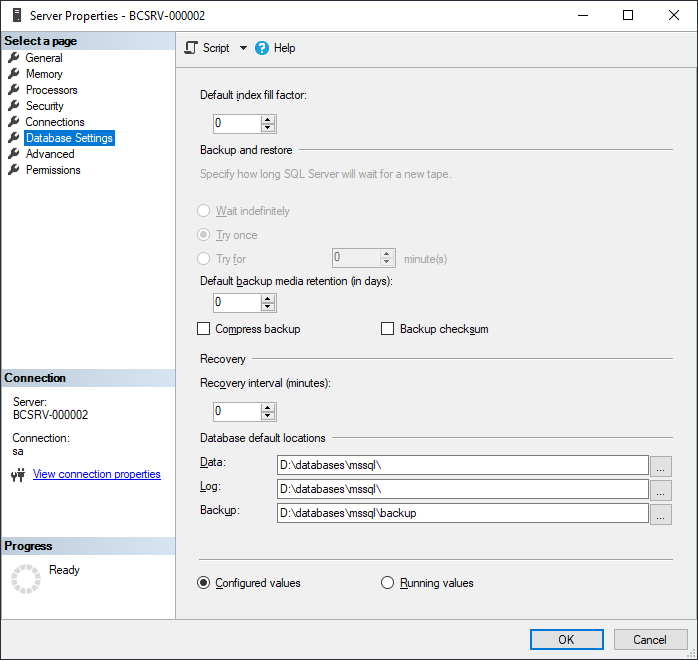
Configuring Default Database Locations
In the Object Explorer in the left-hand column (Picture 59):
-
Right-click on the SQL Server.
-
Click "Properties".
-
Click "Database Settings" in the left-hand column of the window that opens (Picture 60):
Under the "Default database locations" section:
-
Change the location for "Log" to
D:\databases\mssql. -
Change the location for "Data" to
D:\databases\mssql. -
Change the location for "Backup" to
D:\databases\mssql\backup. -
Click "OK".
-
Change the location for "Log" to
-
Right-click on the SQL Server in the Object Explorer in the left-hand column and click "Restart".
-
Click "Yes" in the restart confirmation dialog box.
-
Wait for SQL Server to restart.
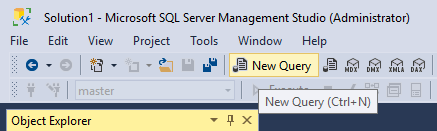
Moving Temporary Database Location
-
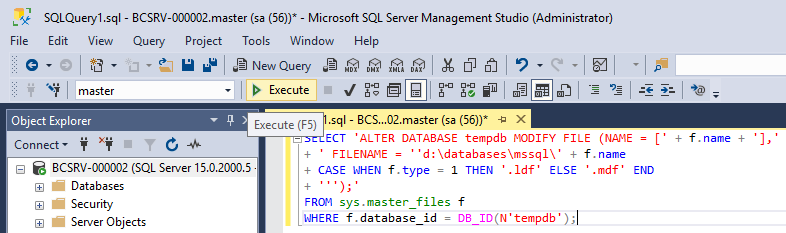
Click the "New Query" button in the toolbar at the top of the screen or press Ctrl+N (Picture 61).
-
Enter the following query:
SELECT 'ALTER DATABASE tempdb MODIFY FILE (NAME = [' + f.name + '],' + ' FILENAME = ''d:\databases\mssql\' + f.name + CASE WHEN f.type = 1 THEN '.ldf' ELSE '.mdf' END + ''');' FROM sys.master_files f WHERE f.database_id = DB_ID(N'tempdb'); -
Click the "Execute" button in the toolbar at the top of the screen or press F5 (Picture 62).
-
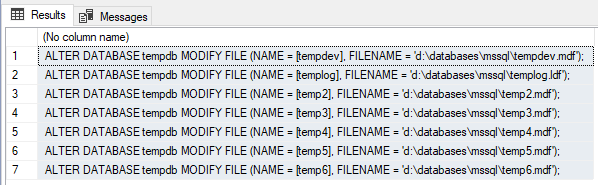
Copy all the contents of the "Results" section at the bottom of the screen by highlighting all the results and copying (Picture 63).
-
Methods to highlight the results:
-
Click and drag the mouse to highlight all the results.
-
Click the "Results" section, press Ctrl+A.
-
Click and drag the mouse to highlight all the results.
-
Methods to copy:
-
Click the "Edit" menu, Click "Copy".
-
Right-click, Click "Copy".
-
Press Ctrl + C.
-
Click the "Edit" menu, Click "Copy".
-
Methods to highlight the results:
-
Click the "New Query" button in the toolbar at the top of the screen or press Ctrl+N again.
-
Paste the contents of the "Results" section (Picture 64).
-
Methods to paste the results:
-
Click the "Edit" menu, Click "Paste".
-
Right-click, click "Paste".
-
Click the "Edit" menu, Click "Paste".
-
Methods to paste the results:
-
Click the "Execute" button in the toolbar at the top of the screen or press F5 again.
-
Right-click on the SQL Server in the Object Explorer in the left-hand column and click "Restart".
-
Click "Yes" in the restart confirmation dialog box.
-
Wait for SQL Server to restart.

Restoring Database Backup
Restore SQL database from backup (if available).
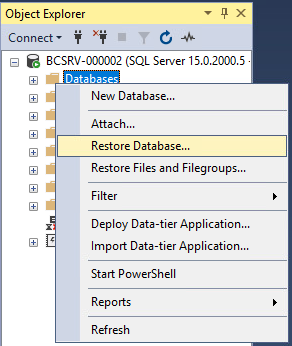
In the Object Explorer in the left-hand column (Picture 65):
-
Right-Click "Databases".
-
Click "Restore Database...".
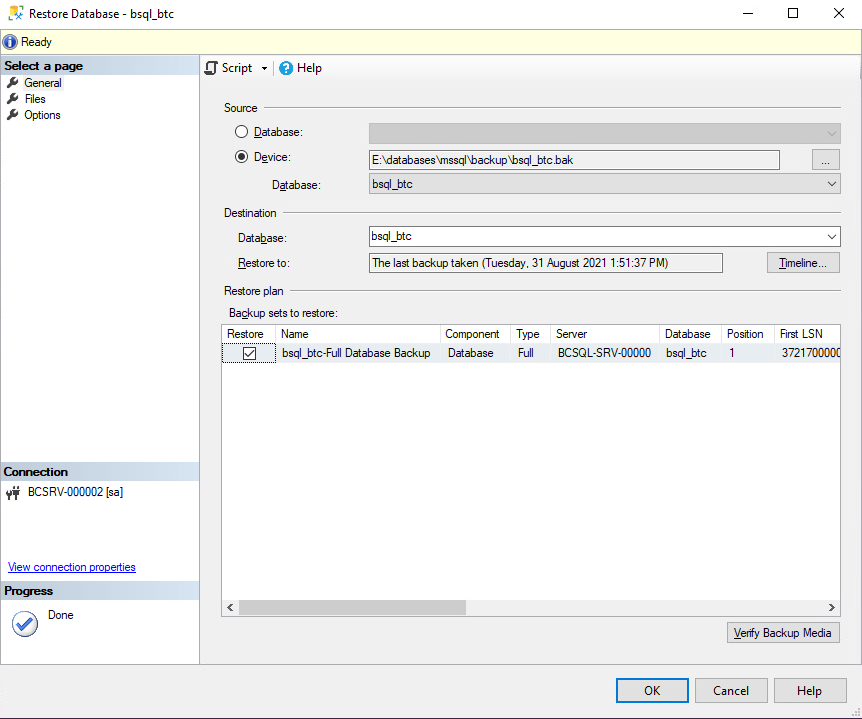
In the "Restore Database" window (Picture 66):
-
Click the "Device" radio button.
-
Click the "..." button next to the "Device" field.
-
Select "File" from the drop down menu.
-
Click the "Add" button.
-
Browse to the backup file location.
-
Click "OK" to close the "Locate Backup File" window.
-
Click "OK" to close the "Select backup devices" window.
-
Click "OK" to begin restoring the database backup.
Installing BlockchainSQL Server
Reference: Unresolved child resource 98f781ce-eb17-46bc-906f-75da8ef3e260.
Setting Up For Installation
Transfer the BlockchainSQL Server zip file to the d:\temp folder.
Extract the contents of the zip file.
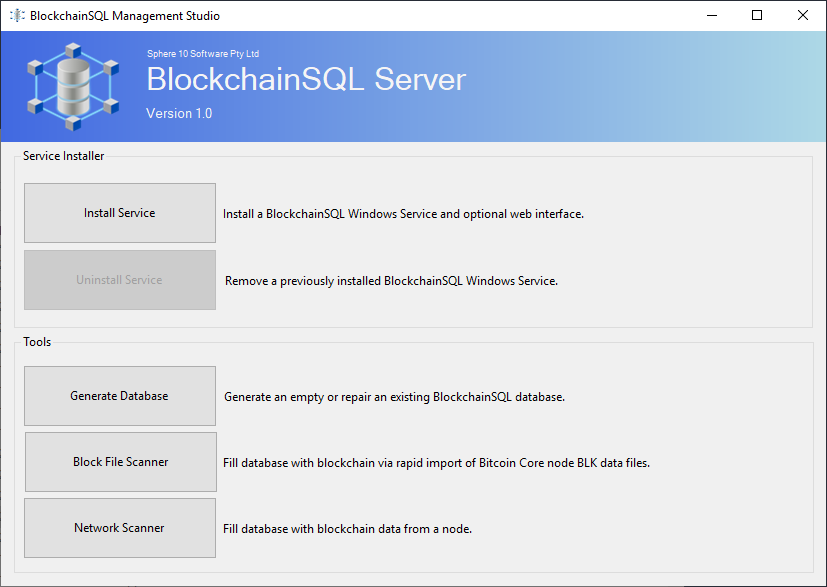
Launch the BlockchainSQL Management Studio - bsql.exe (Picture 67).
Connecting To BTC Block Data
Setup a mapped network drive to the BTC block data.
Run the following commands in a PowerShell window.
000000 with the same sequential number as the Windows Server name (e.g. 000001).
net use b: \\bnvsrv-000000\btc-data /user:bnsadmin
Enter the bnsadmin user password then press Enter.
Generating Database
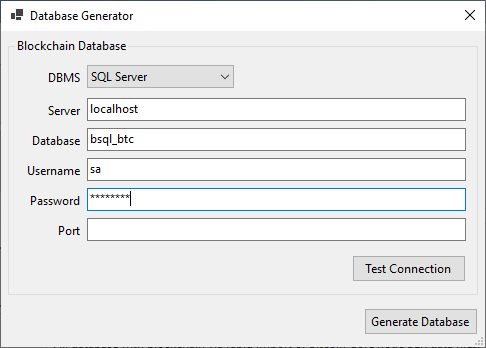
Click the "Generate Database" button to open the Database Generator (Picture 68).
-
Next to "Server" enter
localhost. -
Next to "Database" enter
bsql_btc. -
Next to "Username" enter
sa. -
Next to "Password" enter the password for the
sauser account. -
Leave “Port” empty.
-
Click the "Test Connection" button.
-
Click "OK" after the test has been completed (Picture 69).
-
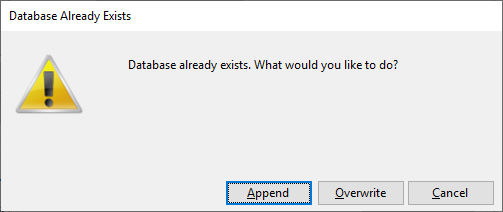
Click the "Generate Database" button.
-
Click "Append" if the database was restored from backup previously (Picture 70).
-
Click the "OK" button after the database has been generated.
Populating Database
-
Check that the Bitcoin block file data is up to date.
-
Run the following command on the Blockchain Node Virtual Server (enter password when prompted):
sudo docker logs --tail 10 node-btc -
Check that the last line reported includes
progress=1.000000.
-
Run the following command on the Blockchain Node Virtual Server (enter password when prompted):
-
Stop the Bitcoin Node Docker Container.
Run the following command on the Blockchain Node Virtual Server (enter password when prompted):
sudo docker stop node-btc -
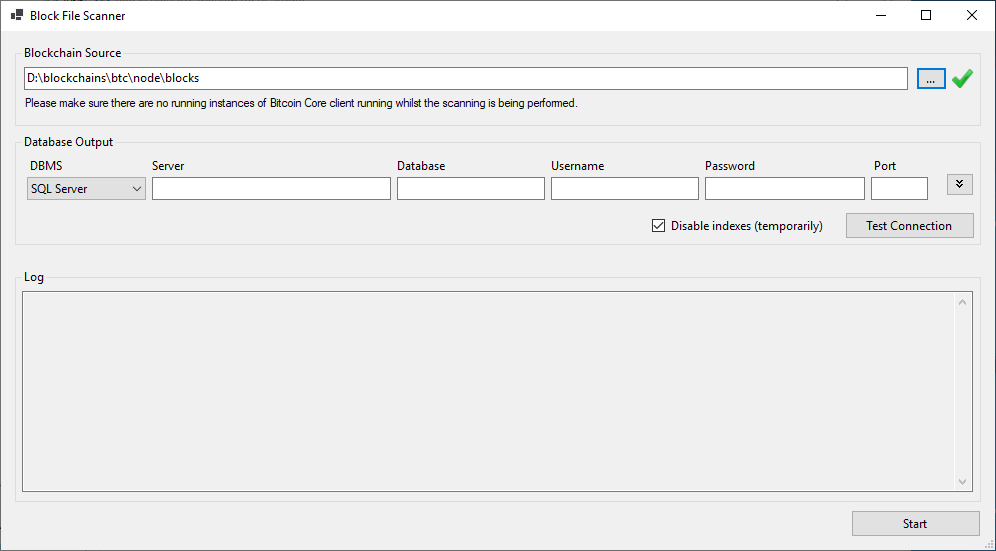
Click the "Block File Scanner" button.
-
Click the "..." button in the "Block File Scanner" window (Picture 71).
-
Browse to
b:\. -
Click the "Select Folder" button.
-
Under "Server" enter
localhost. -
Under "Database" enter
bsql_btc. -
Under "Username" enter
sa. -
Under "Password" enter the password for the
sauser account. -
Leave “Port” empty.
-
Click the "Test Connection" button.
-
Click "OK" after the test has been completed.
-
Click the "Start button".
-
Click the "Start" button.
Leave BlockchainSQL Server Management Studio open to return at a later stage.
Securing Blockchain Database
Launch Microsoft SQL Server Management Studio 18 from the Start Menu.
In the Connect to SQL Server window:
-
Select "SQL Server Authentication" from the "Authentication" drop-down list.
-
Enter
sain the "Login" field. -
Enter the password in the "Password" field.
-
Click "Connect".
Setup user access to the Blockchain Database (picture 72):
-
Click "+" next to "Security".
-
Click "+" next to "Logins".
-
Right-click the
service_usernameuser. -
Click “Properties”.
-
Click “User Mapping” on the left-hand side (picture 73).
-
Under the “Users mapped to this login” section, tick the checkbox next to “bsql_btc”.
-
Under the “Database role membership for: bsql_btc” section, tick the checkboxes next to “db_datareader”, “db_datawriter”, “db_owner” and “public”.
-
Click “OK”.
Leave Microsoft SQL Server Management Studio 18 open to return at a later stage.

Picture 72
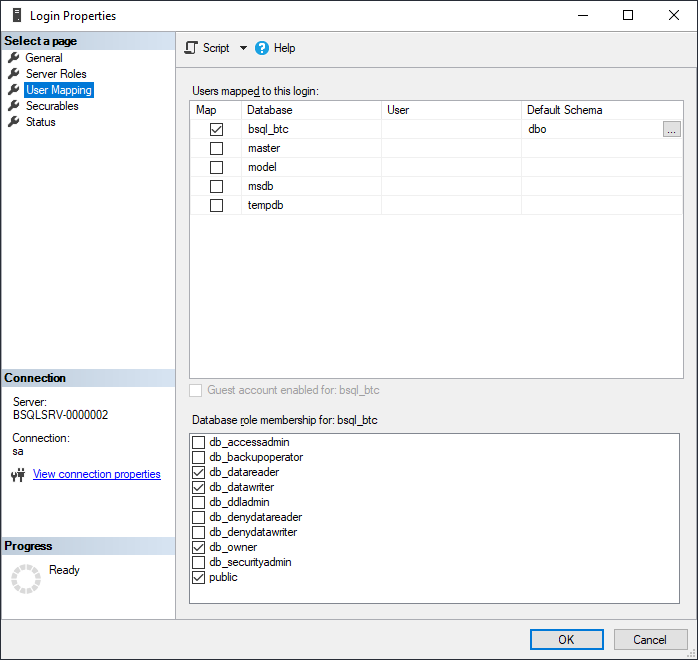
Picture 73
Installing Service
Return to BlockchainSQL Server Management Studio.
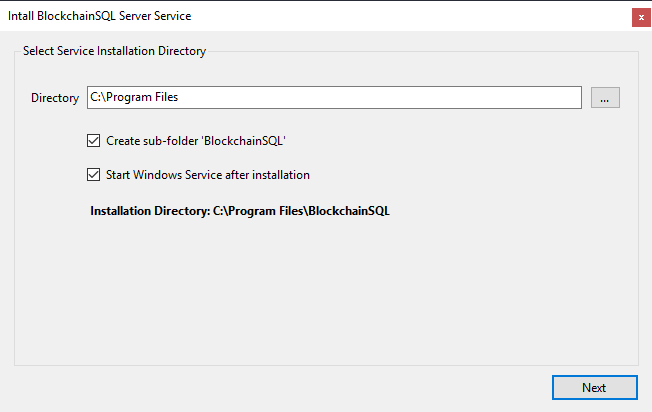
Click "Install Service" in the BlockchainSQL Server Management Studio.
Click "Next" in the "Select Service Installation Directory" window (Picture 74).
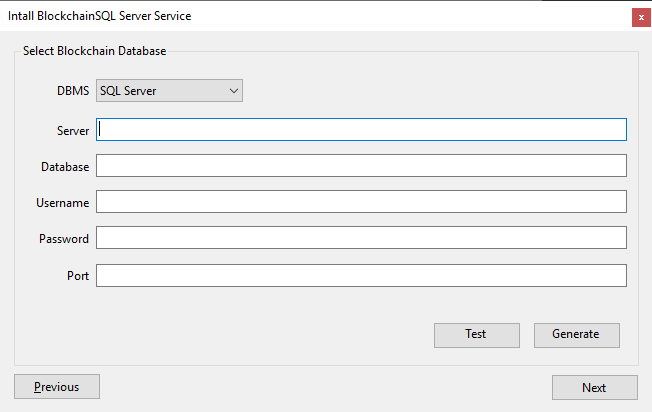
Enter the Blockchain Database details (Picture 75):
-
Next to "Database" enter
bsql_btc. -
Next to "Username" enter the
service_username. -
Next to "Password" enter the password for the
service_username. -
Leave “Port” empty.
-
Click the "Test" button.
-
Click the "OK" button after the test has been completed.
-
Click the "Next" button.
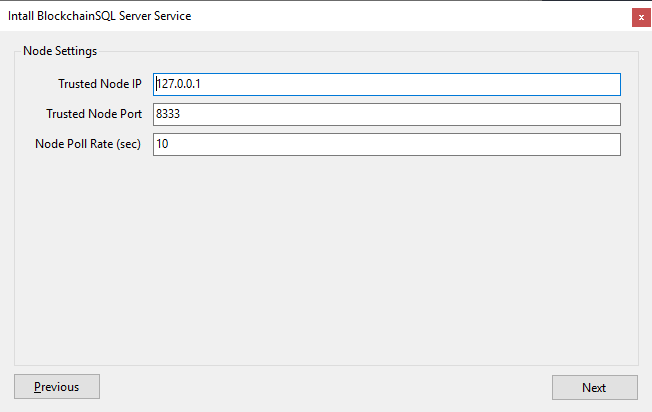
Enter the Node Settings details (Picture 76).
-
Next to “Trusted Node IP” enter the IP address of the Blockchain Node Virtual Server.
-
Click the “Next” button.
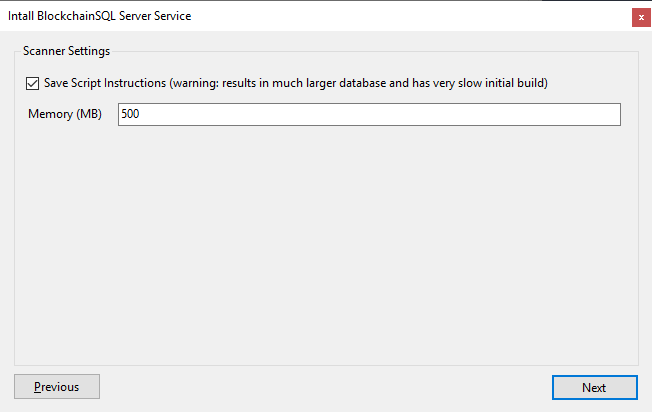
Click "Next" in the "Scanner Settings" windows (Picture 77).
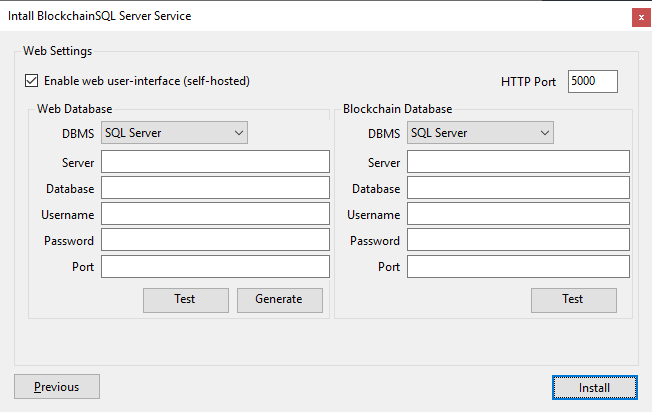
Installing Web User-Interface
This step is optional (Picture 78).
Generate the Web Database:
-
Next to "Server" enter
localhost. -
Next to "Database" enter
bsql_web. -
Next to "Username" enter
sa. -
Next to "Password" enter the password for the
sauser account. -
Click the "Generate" button.
-
Click "OK" button after the database has been generated.
-
Next to "Username" change to the
web_usernameuser. -
Next to "Password" enter the password for the
web_usernameuser account.
Leave BlockchainSQL Server Management Studio open to return at a later stage.
Securing Web Database
Return to Microsoft SQL Server Management Studio 18.
In the Object Explorer in the left-hand column:
-
Right-click on the SQL Server.
-
Click "Refresh".
Setup user access to the Blockchain Database:
-
Click "+" next to "Security".
-
Click "+" next to "Logins".
-
Right-click the
web_usernameuser. -
Click “Properties”.
-
Click “User Mapping” on the left-hand side.
-
Under the “Users mapped to this login” section, tick the checkbox next to “bsql_btc”.
-
Under the “Database role membership for: bsql_web” section, tick the checkboxes next to “db_datareader” and “public”.
-
Under the “Users mapped to this login” section, tick the checkbox next to “bsql_web”.
-
Under the “Database role membership for: bsql_web” section, tick the checkboxes next to “db_datareader”, “db_datawriter” and “public”.
-
Click “OK”.
Microsoft SQL Server Management Studio 18 can now be closed.
Finish Installing Web User-Interface
Return to the "Web Settings" window in the BlockchainSQL Server Management Studio.
-
Click "Test" under the "Web Database" section.
-
Click the "OK" button after the test has been completed (Picture 60 above).
-
Click the "Install" button.
BlockchainSQL Server Management Studio can now be closed.
Reverse Proxy Option 1 - Setting Up On Blockchain Node Virtual Server
See Reverse Proxy Option 2 below for the alternative method of setting up the reverse proxy through the Windows Host Server.
Complete the following steps on the Blockchain Node Virtual Server.
-
Create the directory structure.
Run the following command:
mkdir ~/blockchains/_reverse-proxy mkdir ~/blockchains/_reverse-proxy/audit mkdir ~/blockchains/_reverse-proxy/conf -
Create an empty configuration file.
Run the following command:
touch ~/blockchains/_reverse-proxy/conf/nginx.conf -
Edit the configuration file.
Run the following command:
nano ~/blockchains/_reverse-proxy/conf/nginx.conf -
Fill the text file with the configuration:
Replace 0.0.0.0 with the IP address of the Windows Server Host.
error_log /var/log/nginx/nginx-error.log warn; log_format main '$remote_addr - $remote_user [$time_local] "$request" ' '$status $body_bytes_sent "$http_referer" ' '"$http_user_agent" "$http_x_forwarded_for"'; server { listen 80; server_name proxy; access_log /var/log/nginx/access.log main; location / { proxy_set_header Host $host; proxy_set_header X-Real-IP $remote_addr; proxy_buffering off; proxy_pass http://0.0.0.0:5000; } } -
Setup and run the Docker container for OpenResty (NGINX + extension modules).
Run the following command (enter password when prompted):
sudo docker run -d \ --name=reverse-proxy \ --restart always \ --volume ~/blockchains/_reverse-proxy/conf:/etc/nginx/conf.d \ --volume ~/blockchains/_reverse-proxy/audit:/var/log/nginx \ -p 80:80 \ openresty/openresty -
Allow the Blockchain SQL Web port through the firewall on the Windows Server Host.
Run the following command in PowerShell (Admin):
netsh advfirewall firewall add rule name="Blockchain SQL Web Port" dir=in action=allow protocol=TCP localport=5000
Reverse Proxy Option 2 - Setting Up On Windows Server Host
See Reverse Proxy Option 1 above for the alternative method of setting up the reverse proxy through the Blockchain Node Virtual Server.
Complete the following steps on the Windows Server Host.
Installing IIS
Run the following commands in a PowerShell (Admin) window:
Install-WindowsFeature -name Web-Server -IncludeManagementTools
cd d:\temp
Downloading And Install URL Rewrite
Reference: https://www.iis.net/downloads/microsoft/url-rewrite
Run the following commands in a PowerShell (Admin) window:
curl -OutFile rewrite_amd64_en-US.msi https://download.microsoft.com/download/1/2/8/128E2E22-C1B9-44A4-BE2A-5859ED1D4592/rewrite_amd64_en-US.msi
msiexec /qb /i rewrite_amd64_en-US.msi
rm rewrite_amd64_en-US.msi
Downloading And Install Application Request Routing (ARR)
Reference: https://www.iis.net/downloads/microsoft/application-request-routing
Run the following commands in a PowerShell (Admin) window:
curl -OutFile requestRouter_amd64.msi https://go.microsoft.com/fwlink/?LinkID=615136
msiexec /qb /i requestRouter_amd64.msi
rm requestRouter_amd64.msi
Installing IIS IP And Domain Security
Run the following command in a PowerShell (Admin) window:
Enable-WindowsOptionalFeature -Online -FeatureName IIS-IPSecurity
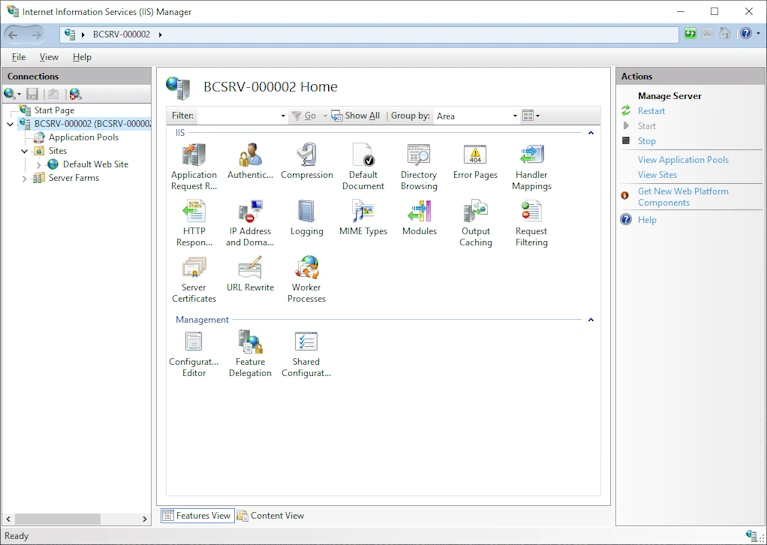
Setting Up IIS Reverse Proxy
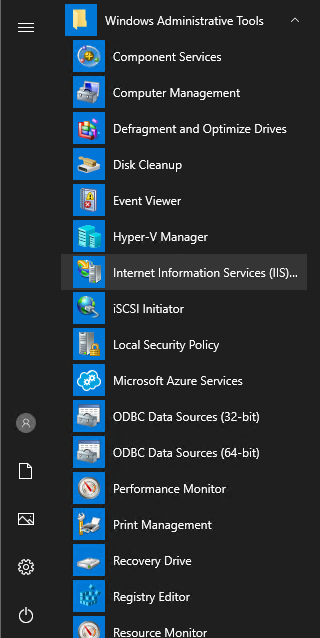
-
Launch Internet Information Services (IIS) Manager, found under Windows Administrative Tools, from the Start Menu (Picture 79).
-
Click the > arrow next to the server in the left-hand column.
-
Click the > arrow next to "Sites" in the left-hand column.
-
Click "Default Web Site" in the left-hand column (Picture 80).
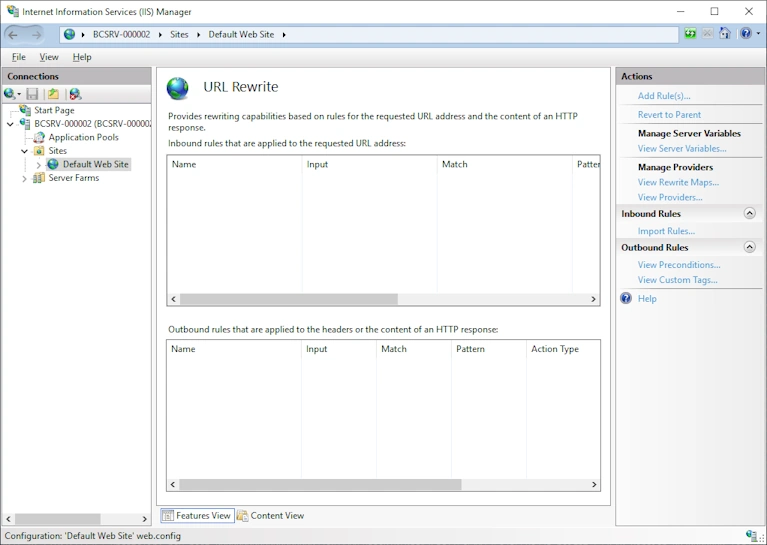
-
Double-click "URL Rewrite" (Picture 81).
-
Click "Add Rule(s)..." in the right-hand column (Picture 82).
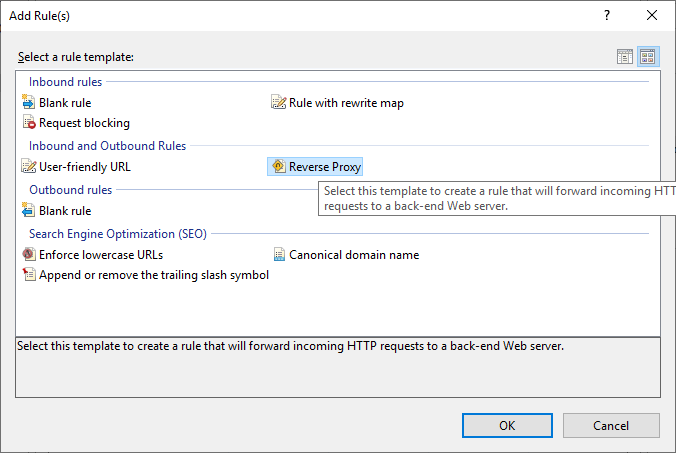
-
Click "Reverse Proxy" then click "OK".
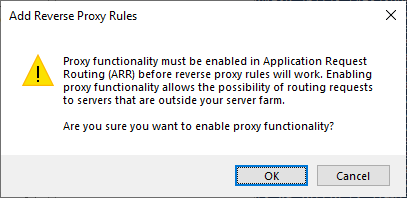
-
Click "OK" in the dialog box to enable Application Request Routing (ARR) (Picture 83).
-
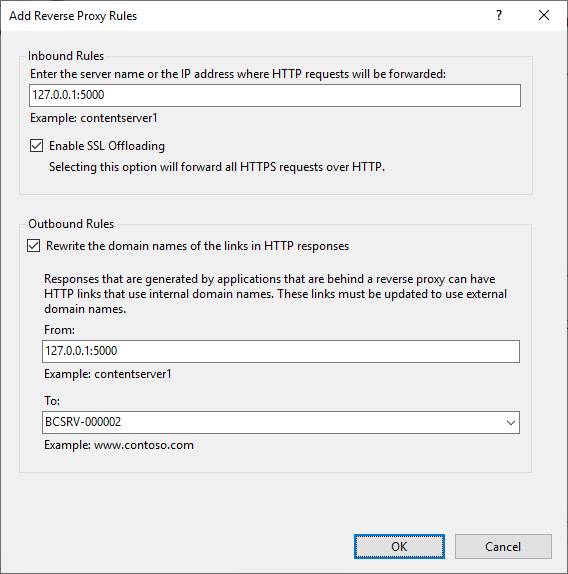
Under "Inbound Rules" enter
127.0.0.1:5000as the server to be forwarded to (Picture 84). -
Under "Outbound Rules" (Picture 84):
-
Tick the "Rewrite the domain names of the links in HTTP responses" box.
-
Enter the server name or fully qualified domain name (FQDN) if available under "To:".
-
Tick the "Rewrite the domain names of the links in HTTP responses" box.
-
Click "OK" .
Further Information
For any questions or more information please contact Sphere 10 Software.